Category: Blog

  • Running HTTPS and Gemini sites on Fly.io

    As it's been way too hot this past week to close my office door and window in order to have a quiet environment for recording Always Developing videos, I had time to clean up the hosting of a whole host of otherwise inactive domains.

    My YouTube channel

    These domains are the usual mix of alternates for in-use domains that I've collected over the years, and generally use for development and testing, such as ianmjones.dev, ianmjones.ninja and the most awesome ianmjones.rocks 🤘. And also a long list of project names that either never took off, didn't make it to release, or are likely never even going to see a single line of code written 😞. In all, we're talking 46 domains.

    However (un)likely it is that these domains are going to eventually become an actual thing, in the interim I wanted to make sure they were at least documented, and preferably reachable, mostly because I hate loose ends.

    Previously…

    Over the previous couple of months or so, I'd already dusted off a project that I'd created a while ago to deploy Caddy web server as a custom Juju Charm, with a companion Caddy Domain Charm that allowed for serving any number of domains as either proxied sites served via other Charms, or static resources.

    Juju

    Caddy

    It worked pretty well, and was fun to develop as I used the Python based Operator Framework for the Charms. Python is a language I don't have much experience with, but I can see why so many people like it as it's super powerful and has a relatively clean syntax.

    However, even though I got the Charms to a useful state, and even deployed to a "manual cloud" at Linode with all these domains, it didn't feel quite right.

    Firstly, it was way over-engineered for a project to host a bunch of otherwise unused domains. As part of the setup I deployed a 2Gb Linode for the Juju Controller, a 1Gb Linode (Nanode) for the Juju Machine that ran the Caddy Charm and subordinate Caddy Domain Charm, and a NodeBalancer to ensure I had a consistent IP address and could re-build or scale the back end.

    Juju is very much a proper enterprise grade application management framework. It's quick to get going with, incredibly scalable, easy to build custom application charms for, and way too much for my needs! 😃

    And of course, with a NodeBalancer, two Linodes, and backups enabled, I was looking at approximately $30 per month in bills. And while I was thinking that at some unspecified future date I'd be using these same machines for hosting other projects at no additional cost, that felt a little high for this particular project (a steal for any other project though given its flexibility).

    sourcehut pages

    Chances are that you're reading this on ianmjones.com, which is hosted on sourcehut pages.

    sourcehut pages

    I did briefly consider just hosting all these domains on sourcehut pages as I'm very happy with the service, it serves both HTTPS and Gemini sites, and it's free.

    However, the way you deploy to sourcehut pages means you need to push out a tarball of the site's content to a unique path per domain and protocol. My build script already deployed to four endpoints to cover ianmjones.com and www.ianmjones.com for both HTML and Gemini content.

    My previous .build.yml for deploying ianmjones.com

    If I wanted to also host another 46 domains, that would have been a total of 96 copies of the site being stored on sourcehut pages' infrastructure, and a whole heap of curl requests to get it there on each update to my site.

    I simply couldn't bring myself to do that, it didn't feel like a responsible or kind thing to do to a fledgling service like sourcehut.

    Fly.io

    And then I listened to a couple of Ship It! podcast episodes that really piqued my interest in Fly.io.

    Fly.io

    Ship It! Podcast

    Episode 50: Kaizen! We are flying âœˆī¸

    Episode 59: Postgres vs SQLite with Litestream

    Episode 60: Kaizen! Post-migration cleanup

    It was "Episode 50: Kaizen! We are flying âœˆī¸" that I think first introduced me to Fly.io, pretty sure I hadn't heard of Fly.io before then. And then along came episodes 59 and 60 which further solidified my interest in the service just as I was thinking about switching away from Juju, especially episode 59 with Ben Johnson, the creator of Litestream, who now works for Fly.io.

    Litestream: Streaming replication for SQLite

    What's interesting about Fly.io is that it takes a Dockerfile and then converts it to run in a very lightweight Firecracker MicroVM. With the Dockerfile format being such as popular and well understood method of deploying applications in the world of software development, this is pure genius. And on top of that, Fly.io's flyctl CLI and a whole bunch more is open source, and they have a very generous free tier that is way more than I need for mucking about with a dinky little static site and exploring the platform for some future projects I may have in mind.

    Firecracker

    Fly.io on GitHub

    Fly.io's Pricing Page

    I just had to have a play and see how easy it might be to host all these sites with them.

    My core requirements were:

    • Deploy a single copy of this static site that all domains use.
    • All domains served over HTTPS using a Let's Encrypt certificate.
    • The site content gets updated at the same time builds.sr.ht updates ianmjones.com.

    Bonus requirement:

    • All domains also served over Gemini using same content as ianmjones.com.

    Initial Deployment for HTTPS

    One of the first docs I found in Fly.io's documentation was a quick start for serving a static site.

    Deploy a static website on Fly

    This was absolutely perfect, not only because it was a well written guide for doing what I wanted to do, but also because it used a super neat minimal web server written in Go. These days, I'm a big fan of the Go language.

    goStatic web server

    I followed that guide, substituting in my site's own public.html build output as the source of the Dockerfile's COPY command, and voila, I had a copy of my site hosted at ianmjones.fly.dev.

    The Dockerfile was very small:

    FROM pierrezemb/gostatic
    COPY ./public.html/ /srv/http/
    

    The fly.toml file needed to deploy the app was generated with the flyctl launch command just as specified in the quick start guide, and only needed the internal_port setting to be updated to change the default value of 8080 to 8043 as used by goStatic. This was all mentioned in the guide.

    It was very simple, and the flyctl CLI client was easy for me to install as there's a version in Nixpkgs that I could add to my system's config and have installed with a quick nixos-rebuild.

    After that, it was just a case of updating the DNS A and AAAA records for a couple of my domains to point them at the IP address of the Fly.io app, and running a command similar to the following:

    flyctl certs add ianmjones.dev
    

    That dutifully added a certificate for the domain to the Fly.io app, and a quick test proved to me that all was well. Then, as I already had a file in my site's repository that listed all the domains, after updating their A and AAAA DNS records, all I had to do was loop over the file and run that flyctl command for each domain, with a little sleep thrown in to be a little nicer. Something like the following:

    cat domains.txt | while read DOMAIN
    do
      flyctl certs add $DOMAIN
      sleep 3
    done
    

    Because I'd already manually added the certs for a few of the domains, I just made sure they weren't in the actual file I used for that automated run.

    Automating Deployment via builds.sr.ht

    So at this stage I had all the domains hosted on Fly.io with auto-renewing certs set up, great, but what about automating site content updates?

    First I just made sure that the Dockerfile and other bits and bobs were squirrelled away in the repo, and then I added a new "secret" to my SourceHut account for a Personal Access Token I generated in Fly.io especially for use with builds.sr.ht.

    builds.sr.ht docs: Secrets

    Integrating Flyctl: Environment Variables

    The builds.sr.ht secret was set as a "file" type, with name "~/.fly_api_token", and contents similar to the following:

    set +x
    export FLY_API_TOKEN="thesupersecretapitoken"
    set -x
    

    Then in the .builds.yml file in the repo I added the new secret's UUID to the secrets section, and a new task to the end that sourced the .fly_api_token file and used flyctl to deploy the site with the contents built by an earlier task.

    image: nixos/unstable
    oauth: pages.sr.ht/PAGES:RW
    packages:
      - nixos.kiln
      - nixos.gmnitohtml
      - nixos.flyctl
    ...
    secrets:
      - d6dddce0-cce3-4ffd-ae12-e08687dc13ba
      - a634b767-e6bb-4efe-be10-0105161d7334
    tasks:
      ...
      - deploy: |
          . ~/.fly_api_token
          cd $site
          flyctl deploy
      ...
    

    When you create a secret in your account, SourceHut assigns a UUID that only your account can use in builds, ensuring that the otherwise public nature of build manifests doesn't compromise your secrets.

    With that in place and a small change to my site's content to ensure a successful deployment could be recognised, I committed and pushed the changes. Within a few minutes I had a notification from SourceHut that a successful build had completed, and I could see the changes in the Fly.io hosted sites.

    I now had all my core requirements covered, with a single deployment of site content to Fly.io being served via HTTPS and updatable via builds.sr.ht. 🎉

    Serving Gemini Content

    Given the title of this post, you know I couldn't stop there though, I had to enable serving the sites over Gemini too! 😄

    At first I played with getting a Gemini version of my site up and running locally, as up until then I'd only ever seen my site rendered in Amfora (a Gemini browser) once I'd pushed it to sourcehut pages.

    Amfora: A fancy terminal browser for the Gemini protocol

    I spent quite a bit of time working with Adnan Maolood's Nova Gemini server.

    Nova

    It worked great when I compiled and ran it locally, but I really struggled to get it working within a Docker container. I wanted to get it working in a container so that I could then easily use it with with Fly.io, but while I could get it to build, including as a scratch container after a builder stage, it kept on wanting Amfora to reconnect on a much higher port than the initial Gemini port 1965. I presume this is something to do with certificate generation, as like with most Gemini servers you get TOFU (Trust On First Use) TLS certificates generated for you so that a third party certificate authority isn't required. It may not even have been that, I really don't know, but either way, I couldn't get it to work in a container and it seems to only generate certificates for a domain that you specify as an arg on startup too, which wouldn't scale well when I have 46 domains each therefore requiring separate processes. That was a shame as it would have been nice to have used a minimal Gemini server written in Go along with a minimal HTTPS server also written in Go. 🤷

    Then I took a look at Drew Devault's gmnisrv program that I believe is used for the sourcehut pages Gemini service.

    gmnisrv

    sourcehut pages Gemini hosting

    This again is a simple Gemini server, but this time written in C. After a bit of investigation I found that gmnisrv was already packaged for the distro I tend to use in containers, Alpine Linux. This wasn't too much of a surprise as I know Drew not only likes Alpine Linux but contributes a lot to it, including packaging software. What was a nice surprise though was that gmnisrv is also in Nixpkgs and therefore available on my NixOS machines, as well as many other distros.

    gmnisrv also does TOFU certificates, and crucially, has a nice simple ini file that specifies where certificates are to be stored (I'll come back to this in a minute), and also which domains are to be served and where their files are to be found. This ini file format is simple enough that I could easily create what amounts to a template that specifies the core settings at the top, and then I could append entries for each domain pointing to the same files with a for loop very similar to how I added certs to Fly.io.

    Here's what the gmnisrv.ini.tmpl file looks like:

    # Space-separated list of hosts
    listen=0.0.0.0:1965 [::]:1965
    
    [:tls]
    # Path to store certificates on disk
    store=/data/gemini/certs
    
    # Optional details for new certificates
    organization=Ian M. Jones
    
    [localhost]
    root=/srv/gemini
    

    And here's the gmnisrv.ini.sh script that is used generate a usable gmnisrv.ini file:

    #!/usr/bin/env bash
    
    CURR_DIR=`dirname $0`
    INIFILE=${CURR_DIR}/gmnisrv.ini
    
    # Start gmnisrv.ini with a clean slate.
    cat ${CURR_DIR}/gmnisrv.ini.tmpl > ${INIFILE}
    
    # Let's do the simplest thing possible to append domains ...
    cat ${CURR_DIR}/domains.txt | while read DOMAIN
    do
            echo "" >> ${INIFILE}
            echo "[${DOMAIN}]" >> ${INIFILE}
            echo "root=/srv/gemini" >> ${INIFILE}
    done
    
    exit 0
    

    It was then a cinch to create a Dockerfile for serving the Gemini content:

    FROM alpine
    
    RUN apk update && \
            apk add gmnisrv && \
            mkdir -p /data/gemini/certs && \
            chown gmnisrv:gmnisrv /data/gemini/certs
    
    COPY ./gmnisrv.ini /usr/etc/
    COPY ./public.gmi/ /srv/gemini/
    
    EXPOSE 1965
    USER gmnisrv
    
    ENTRYPOINT ["gmnisrv"]
    

    And that could be brought up with something like:

    docker build -t ianmjones/gmi:latest -f Dockerfile.gmi .
    docker run -d -p 1965:1965 --name ianmjones-gmi ianmjones/gmi
    

    That worked fine, I could use amfora to navigate to gemini://localhost/ and view the Gemini version of my site locally, yay! 🎉

    Then came the head-scratcher moment, how do I get Fly.io to serve both HTTPS and Gemini on the same domain names?

    My first instinct was to try and see if I could add a second app using my new Dockerfile.gmi, and then tell Fly.io to route port 1965 (gemini) to that app rather than the current ianmjones app that handles ports 80 (http) and 443 (https). However, I couldn't find an easy way to do that without building a new version of the ianmjones app that acts as a proxy server. Fly.io does have the concept of a "replay header" that allows your app to respond to a request to tell Fly.io to replay the request on another app or instance, but that just seemed like overkill for this use-case.

    The Fly-Replay Header

    The only sane option really was to update the current app that serves the HTTP site with a goStatic process, to also run a second gmnisrv process for serving Gemini content.

    So that's what I did.

    I created a Dockerfile that built goStatic (as it's not packaged for alpine) in a builder stage, and then in the final stage copied across goStatic from the builder stage, installed gmnisrv, copied in the static files and configs for both the html and gmi based sites, and then used a very naïve shell script as the entry point that started both goStatic and gmnisrv.

    The Dockerfile:

    # Build
    FROM golang:alpine AS builder
    
    WORKDIR /go/src/github.com/PierreZ/
    
    RUN apk update && \
            apk add git && \
            git clone https://github.com/PierreZ/goStatic.git
    
    WORKDIR /go/src/github.com/PierreZ/goStatic
    
    RUN go build -ldflags="-s" -tags netgo -installsuffix netgo -o ./goStatic
    
    # Dist
    FROM alpine
    
    WORKDIR /
    
    COPY --from=builder /go/src/github.com/PierreZ/goStatic/goStatic /usr/bin/goStatic
    
    RUN apk update && \
            apk add gmnisrv && \
            mkdir -p /data/gemini/certs && \
            chown nobody:nobody /data/gemini/certs
    
    COPY ./entrypoint.sh .
    COPY ./gmnisrv.ini /usr/etc/
    
    COPY ./public.html/ /srv/http/
    COPY ./public.gmi/ /srv/gemini/
    
    EXPOSE 8043
    EXPOSE 1965
    USER nobody
    
    ENTRYPOINT ["./entrypoint.sh"]
    

    The entrypoint.sh shell script:

    #!/usr/bin/env sh
    
    /usr/bin/goStatic &
    /usr/bin/gmnisrv &
    
    # Wait until first background process exits.
    wait -n
    
    # Exit with status from first background process to exit.
    exit $?
    

    After testing it locally with something like …

    docker build -t ianmjones/static:latest .
    docker run -d -p 8043:8043 -p 1965:1965 --name ianmjones-static ianmjones/static
    

    … having previously stopped and removed the docker containers I'd been using for testing, I was ready to commit and push the new setup to git.sr.ht to trigger a build and deploy to both sourcehut pages and Fly.io.

    Well, first I need to make sure that Fly.io knew how to handle requests on the Gemini port of 1965, as up until then it only knew about ports 80 and 443.

    To accomplish that, all I had to do was duplicate the [[services]] section in the fly.toml file that deals with internal port 8043, and update the new section to use internal port 1965, and handle any tcp connection on external port 1965.

    [[services]]
      http_checks = []
      internal_port = 1965
      processes = ["app"]
      protocol = "tcp"
      script_checks = []
      [services.concurrency]
        hard_limit = 25
        soft_limit = 20
        type = "connections"
    
      [[services.ports]]
        port = 1965
    
      [[services.tcp_checks]]
        grace_period = "1s"
        interval = "15s"
        restart_limit = 0
        timeout = "2s"
    

    With that in place, committed and pushed, I had a working Fly.io app that served my static site via both HTTPS and Gemini protocols.

    One little thing that I then improved was to make sure gmnisrv saved the certificates it generated on first use to a volume mounted into the MicroVM.

    This was easy enough. All I had to do was create a 1Gb volume on Fly.io:

    flyctl volumes create ianmjones_data --region lhr --size 1
    

    A 1Gb volume is way bigger than I need, I could have got away with just 100Mb, maybe less. But from what I can see, it's only possible to create volumes with an integer for the size, so 1Gb is the minimum.

    Then I told the app to mount the volume as /data by adding the following to the fly.toml file:

    [mounts]
    source="ianmjones_data"
    destination="/data"
    

    In the gmnisrv.ini file that I talked about earlier you may have noticed that it didn't use the standard path of /var/lib/gemini/certs for the tls store, instead it used /data/gemini/certs, and the Dockerfile made sure its path existed and was owned by the user that runs gmnisrv. Now you know why! 😉

    You can check out the current config for my site on git.sr.ht.

    ianmjones.com repo

    The most important parts for the Fly.io setup are the Dockerfile and fly.toml files.

    https://git.sr.ht/~ianmjones/ianmjones.com/tree/master/item/Dockerfile

    https://git.sr.ht/~ianmjones/ianmjones.com/tree/master/item/fly.toml

    Future Improvements

    The Dockerfile could do with a bit of optimization, there really isn't any need for running apk update, at least not twice, and it could likely install gmnisrv in the builder stage and just copy it into the final stage if it's a static binary (I'll have to check). Even without moving the gmnisrv install step into the builder stage, I think it can be optimized a little by not running the apk update at all, and not caching during the apk add step. I'll have to test those things out locally.

    Talking of local dev, I could likely make the local dev experience better by not rebuilding the entire Docker image when wanting to refresh the local content. I'll probably change things up so that local dev just mounts the public.* output dirs into the running container for instant refresh.

    Another thing I could improve in the local dev experience is to mount a local dir into the container for gmnisrv to save certificates to. At present whenever the image is rebuilt I get a warning when reconnecting to the local Gemini site that the certificate has changed. This isn't the case in the version deployed to Fly.io because of the mounted volume.

    That Was Fun

    All in all, that was a fun little diversion for a few mornings. And I'm pretty sure that I'll be deploying my next hosted project to Fly.io as the experience was awesome, and there's a lot more to the platform than I've used so far.

  • A Year of Always Developing

    Well, would you believe it? Today marks a year since I started publishing "live" coding sessions on YouTube!

    My YouTube channel

    My first video was published on the 8th of April 2021, but I didn't announce it until the 20th of April.

    AlwaysDeveloping.show is now on YouTube

    So, how's it going?

    Great! 😊

    Today I published session 150.

    Snippet Pixie: Next – Fix NixOS CI/CD for Wails, remove default SvelteJS UI | Always Developing #150

    It's part of my series whereby I'm rebuilding Snippet Pixie with Go. It's the second in the series where I'm also using Wails to build the desktop app with HTML, CSS and Svelte for the front end, and Go for the back end.

    To date I've recorded 155 sessions. 152 have been published (there's a couple of #.1 mini sessions), 3 are still being processed by YouTube. It can take multiple days for YouTube to fully process some of my videos as they're recorded in 4k, and can be an hour or so long. And although I could publish them after the initial "SD" processing, which is usually done within an hour or two, because there's a bunch of code on screen, it's better to wait until the "HD" versions are ready.

    There's been some ups and downs in the sessions. Many sessions have seen me floundering as I try to learn new technologies, and grapple with some concepts I'm not familiar with. There's also been plenty where I've been amazed at how quickly something came together. That's typical for software development, some days are bad, some are good, and this kind of "warts 'n' all" recording shows that.

    To be fair, as I'm recording these sessions first thing in the morning with barely any coffee in my system, I'm not exactly at my best. I generally work much better later in the day, late morning through to late-afternoon tends to be a sweet spot, when non-code tasks are dealt with, I'm relaxed, caffeinated, and can concentrate much easier. That's why I work those hours for Delicious Brains.

    I started off the recordings working on a new project, GoalMonitor, but eventually discarded that and switched to the Snippet Pixie rewrite.

    Snippet Pixie: Next – Always Developing #60

    I recorded 40 sessions while working on GoalMonitor, but am already at 91 for "Snippet Pixie: Next", with 3 more in the can.

    GoalMonitor – Svelte + Go + CockroachDB + Juju YouTube playlist

    Snippet Pixie: Next YouTube playlist

    Are you going to continue with Always Developing?

    You bet I am!

    I'm really enjoying my daily sessions working on Snippet Pixie, and having these allotted hours for doing so removes the pressure to do it in the evenings.

    This means I've had much more relaxed evenings since starting Always Developing, with more time spent catching up with my humongous watch later list on YouTube, reading articles, and some small contributions to some other projects.

    Today I did make a couple of changes to the YouTube channel though. I've changed the channel's name to "ianmjones", added my beautiful face as the channel avatar, and updated the custom URL to include "ianmjones".

    I did this because it felt very impersonal to have the channel named "Always Developing" and with a logo for the channel avatar. I think that may have been a little off-putting to some people, and it doesn't reflect the very personal nature of my videos. It's also my personal YouTube account, and so if I were to join in the chat for a stream or something, I'd prefer to be known as "ianmjones" rather than "Always Developing".

    I'll still be calling the coding sessions "Always Developing", I think it fits, and has been my personal slogan for many years now.

    Here's to another 150 or more videos! 😀

  • 2021 Year in Review

    This time last year I did my first ever "Year in Review" post, it was a rather long post.

    2020 Year in Review

    This year I intend to mostly cover the same areas, but keep the post much shorter and succinct. I'm also rolling in a review of my 2021 goals, and setting my 2022 goals, but again, keeping it short.

    Business

    This year I completed my 7th year working with Delicious Brains as a senior software developer, continuing to work on their WP Offload Media plugin for WordPress.

    WP Offload Media

    2021 was quite a momentous year for Delicious Brains, the most obvious event being the acquisition of the Advanced Custom Fields (ACF) plugin.

    A WordPress Announcement of Epic Proportions

    I'm still thoroughly enjoying working on WP Offload Media, and with my team mate Erik. We've been working on some rather large changes to the plugin this year, which I can't talk about yet, but hopefully soon.

    We also had Kevin join us near the end of the year as our product manager, replacing Iain who now steers the ACF plugin. While sad to lose my friend Iain, I'm looking forward to working with Kevin this coming year.

    There's been a bunch of new hires this past year, so many I'm starting to lose track of who does what! I can say though that each one seems to be both talented and a nice person, keeping Delicious Brains a lovely place of work.

    Side Projects

    There's been a couple of big changes to my side projects this last year.

    Snippet Pixie

    At first it may look like Snippet Pixie didn't get much attention this year as there were only 3 bug fix release, 1.5.1 – 1.5.3.

    Snippet Pixie

    Snippet Pixie releases

    However, those releases were reasonably important and stabilized the app considerably. I also spent a not insignificant amount of time trying to package Snippet Pixie as a Flatpak so that it could be included in elementary OS 6's new App Center. However, due to some policies in the Flatpak project that cripple accessibility toolkit usage, I ran up against a brick wall.

    Because there was therefore no way of getting Snippet Pixie included in the App Center, it kind of freed me up to tackle a much needed rewrite to improve the app's architecture, along with using a technology I want to learn. As a consequence I'm currently in the middle of a full rewrite of Snippet Pixie using the Go programming language, and recording most of my development sessions along the way too.

    Snippet Pixie: Next – YouTube playlist

    There's a good way to go before it becomes something usable, but the rewrite is going well, I think, and I'm certainly enjoying it.

    WordPress Plugins

    WP Cron Pixie saw no updates this past year, it didn't need any. Although I guess I should probably have updated the readme a couple of times so people know it still works fine with the latest version of WordPress. ¯\_(ツ)_/¯

    WP Cron Pixie

    In contrast, WP Table Pixie saw a large change, it's no longer for sale as a premium upgrade to a Lite version. All previously premium functionality has been rolled in the free version found in the wp.org repository.

    WP Table Pixie Premium discontinued

    Always Developing

    In 2021 my podcast pivoted to a "live" coding style YouTube vlog.

    Once I got over the initial fear of publishing warts-and-all development videos, it's become an integral part of my working day to record for an hour or so before I have a hard-stop to attend a daily stand-up with Erik.

    Always Developing – YouTube playlist

    This format has really helped me to get stuck into learning Go, and to achieve steady progress with what I'm developing. Initially that was GoalMonitor (the secret project I mentioned last year), but then the Snippet Pixie rewrite.

    Secret Project

    As just mentioned, I did start on developing GoalMonitor as part of my Always Developing recording sessions, but eventually decided it wasn't something I was passionate enough about to continue with. I'll touch on this again in my review of Goal 1 below.

    Personal

    COVID-19 played a big part in my family's life in 2021, just like for most of the World. Mostly it just hampered doing "normal" things somewhat, with various periods where restrictions meant we couldn't travel or meet up with loved ones.

    A highlight of the year for sure was being able to go to Yorkshire for a week's holiday with my wife and daughter when national travel restrictions were relaxed. Made even more special by spotting my Mum and Dad sitting outside the cottage next to ours as I parked the car! I hadn't seen my parents for over a year, and my wonderful wife had secretly organised for them to have a holiday that overlapped with ours. And even though we had to socially distance, it was a wonderful surprise.

    Otherwise, as you'll see in my goals review below, I really let things slip with my health, partly due to problems with my back, but truthfully, probably also due to a lack of motivation in these "unprecedented times".

    One thing I can say for sure, having some serious lower back pain and COVID at the same time is not recommended. The coughing and sneezing from COVID wrenched my back a bunch of times, it hurt, a lot.

    Not long before getting COVID at the beginning of December I'd had a couple of weeks of treatments with a Chiropractor. That naturally had to stop as soon as my daughter got COVID, just in case she passed it on to me, which she dutifully did. I should be fine to return to the Chiropractor in a few days, hopefully the next few sessions will put things right.

    Last Year's Goals

    This time last year I set 5 goals for 2021.

    2021 Goals

    Let's briefly chronicle how badly I failed to achieve those goals.

    Goal 1: Release 1 new software product by 01/11/2021

    My plan was to work on GoalMonitor and release v1.0 before November. That did not happen.

    By mid June I found myself losing my passion for GoalMonitor, and stopped working on it as part of Always Developing.

    In late September when I started work on a rewrite of Snippet Pixie I wrote a post that mentioned this.

    Snippet Pixie: Next – Always Developing #60

    I didn't release any other new software products either. Therefore this goal is a clear fail.

    Goal 2: Secret Project earns $10 MRR by 31/12/2021

    Naturally, if you don't release a product then no one can pay for it. So it does not come as a surprise that my goal of earning at least $10 monthly recurring revenue from the new product didn't happen either.

    Goal 3: Write 12 blog posts by 31/12/2021

    I published 13 new posts to my main blog in 2021! Well, OK, a couple were very short test posts, more worthy of my microblog.

    Microblog

    However, seeing as I also posted 10 times to my microblog, and feel like they contribute to the goal's purpose of getting me to post more stuff, I think I'll count this goal as achieved! 🎉

    Goal 4: Release 6 episodes of Always Developing by 31/12/2021

    In April I finally summoned enough courage to start publishing video recordings of almost daily development sessions.

    AlwaysDeveloping.show is now on YouTube

    My last session released in 2021 was #104, which was actually the 106th video released as there were a couple of ".1" follow-up recordings too.

    I think it's fair to say that I smashed this goal! 🎉

    Goal 5: Practice strength yoga 156 times by 31/12/2021

    After a reasonably strong start, this goal went off the rails 3 weeks into January when I found the Yoga was hurting my wrists and back. After a month of doing other exercises, I tried again, but soon found my back simply wasn't up to it and the yoga re-awoke some back issues I've had since I was a teenager doing way too many sports.

    I've not seriously returned to consistently doing any yoga since the end of February, and therefore never got anywhere near 156 sessions in 2021.

    Summary of 2021 Goals

    3 misses, 2 hits.

    It's good to have achieved 2 of my goals, but concerning that I failed on 3.

    To be honest I didn't have much hope that I'd build and release a new product in 2021, let alone make any revenue. I simply didn't feel like I had a great idea for a product, wasn't sure on how it should be designed, and just lost faith in it.

    The most concerning failure is goal #5, as that tied into health and fitness, and I really let that slip in 2021. Which brings us neatly to my goals for 2022.

    2022 Goals

    This year I have a single goal.

    Goal: Weigh 168 lb by 31/12/2022

    As of this morning I weigh 189.8 lb, which is approximately 13.5 stone, or 86 Kg. That's the heaviest I've been in quite some time.

    By the end of the year I want to weigh 168 lb, which is 12 stone, or 76.2 Kg.

    This means I need to lose just over 0.4 lb per week, which is an easily attainable goal.

    I really hope to achieve this weight by 01/07/2022, which should be easily doable at a healthy rate of approx 0.85 lb per week.

    I then intend to maintain that weight for the rest of the year, hopefully the rest of my life!

    I'm keeping the goal's target date as the end of the year though.

    168 lb is bang in the middle of the healthy weight range for my height of approx 6' 1", or 185 cm. I know from experience that when I'm at that weight I feel much fitter, and look an OK weight. If I go under that weight then I "look like a bobble head", as my wife puts it. 😀

    When I'm at that weight I tend to not have any issues with my back either, everything kinda feels right.

    Although I'm measuring weight for my goal, clearly that's not a great indicator of health and fitness, it's just one component. So while weight is an easily measurable value, I do intend to improve my health in other ways that as yet I'm not sure how I want to measure, if I can measure, or if I want to.

    I need to improve 3 key areas, flexibility, strength, stamina.

    This can only be achieved through physical activities, and I have tentative plans on what they will be, but I think I'll leave talking about them for another day.

  • Snippet Pixie: Next – Always Developing #60

    Today I published Always Developing session #60, which is both the start of a new series of videos, and a new chapter for my Snippet Pixie application.

    Snippet Pixie: Next – Rebuilding from scratch with Go | Always Developing #60

    Snippet Pixie's website

    Snippet Pixie: Next

    As the video title suggests, I'm rebuilding Snippet Pixie from the ground up using a completely different programming language. Instead of Vala, I'm going to use Go for the rewrite.

    Reasons For Rewrite

    There's a number of reasons that I'm doing this, but first and foremost it's because I'm wanting to learn the Go programming language.

    A good chunk of my earlier Always Developing sessions were with me building a GoalMonitor web application to help me learn Go for the back end, and Svelte for the front end.

    Playlist: GoalMonitor – Svelte + Go + CockroachDB + Juju

    https://golang.org/

    https://svelte.dev/

    I've recorded 40 GoalMonitor related sessions, but found myself not wanting to continue with them, leading to skipping recording (making a lie of "Always Developing"), or making videos on different subjects instead. The application was starting to get to the point where I'd need to invest considerable time into completing it, but it's not a project I currently need. Without that need for the application, I just don't have enough motivation to push it forward in my spare time, even though I would likely learn a huge amount by doing so.

    Snippet Pixie is a project that I'm passionate about, that I use many many times every day, but yet is in need of some attention to address some issues it currently has, and push it forward. Some of the issues with Snippet Pixie that I need to address relate to it's current architecture, and there's quite of lot of work needed to fix that. I'd rather spend that time working with Go than Vala. Go is rather good for building daemon and CLI apps, which just so happens to be part of my plan for improving Snippet Pixie's architecture and unblock the path to fixing some of its issues.

    Don't get me wrong, Vala is a perfectly fine language, in fact I quite like it, but even with as little experience as I have in either Go or Vala, I'm drawn more to Go.

    While wanting to learn Go and needing to fix the code bases' architecture are the main reasons for re-coding Snippet Pixie from scratch, it also gives me the opportunity to use a different license.

    New License

    Snippet Pixie currently uses the GNU General Public License v2.0 (GPLv2) license.

    https://github.com/bytepixie/snippetpixie/blob/develop/LICENSE

    I don't like the GPLv2 license because it imposes too many conditions that restrict your freedom to use the code as you see fit. I would much prefer that if someone finds useful code in Snippet Pixie's code base they can use it without worrying about the implications of doing so.

    As such, I'm using the MIT license for the new from scratch Snippet Pixie code base.

    https://choosealicense.com/licenses/mit/

    This may turn out to be particularly helpful if I end up creating any Go packages that can be used by others. As the development of Snippet Pixie progresses there's a good chance I'll end up working with the AT-SPI2 DBUS interface if wanting to keep feature parity with the current release of Snippet Pixie.

    https://gitlab.gnome.org/GNOME/at-spi2-core/

    That interface is currently used by Snippet Pixie to implement auto-expansion of snippets. Unfortunately I've not been able to find any currently maintained Go libraries for dealing with the AT-SPI2 service, so I may end up having to work on that myself. That's a long way off though, and frankly may never happen as I find myself using Snippet Pixie's "Search & Paste" window way more than auto-expansion. Search & Paste has far better compatibility across applications as many don't implement the required accessibility features, and I often find it easier to type a few letters into the search dialogue than try and remember the abbreviation I set for a particular snippet.

    Contributions

    Apart from myself, there have been 4 other lovely people that have been generous enough to contribute to Snippet Pixie.

    https://github.com/bytepixie/snippetpixie/graphs/contributors

    Ordinarily I believe this might cause a problem with re-licensing as you should get everybody's approval for the parts they've contributed to as they hold the copyright, or something to that effect (I'm not a lawyer, have never played one on TV, and have zero interest in becoming a lawyer). However, 2 of those contributors only touched files related to building the .deb package or running tests on Travis CI, neither of which need to be carried forward to the new version of Snippet Pixie. Their contributions were super helpful, but going forward I don't need to worry about their copyright for the code they contributed.

    The other 2 contributors mostly touched the translation files, and little bit of the build config related to translation, and I think made a string or two translatable in the core codebase.

    I would rather not lose the work done on those translations, it's incredibly valuable work, but I'm unclear as to whether I would be able to update the license in the current repo without some sort of official gubbins. I'm sure NathanBnm and Vistaus would give their blessing, but I'm not sure whether there's anything (or anyone) else that I need to take into consideration before switching out the license.

    New Code Repository

    As I'm not the sole contributor to the current version of Snippet Pixie but want to use a different license, I've gone the safe route and started again from a new repository.

    What I might do in the future is take the translation data and massage it into a new format that I anticipate needing to generate for the new Go code base. Once generated (or most likely painstakingly copy/pasted one line at a time) I'll seek out NathanBnm and Vistaus to get their blessing before merging into the main branch.

    In the video I mention that another reason for the new repository is that as I'm trying to learn Go as part of this rewrite, I'd rather not have any outside contributions at the moment. I don't want some kind sole contributing a bunch of excellent code that means I don't get to learn how to implement that feature or whatnot myself, or that I may not fully understand yet anyway! I'm all for comments on my videos letting me know about a trick I've missed or some doc I should take a gander at though.

    So I've created a brand new GitHub organisation for Snippet Pixie, and as part of the video linked above you can see that I created a private repo. In due course it'll be made public.

    Finally, another reason for using a new repo is that the current Snippet Pixie repo has a few services hooked up for testing and package building that I'd rather not disrupt. If I were to start committing to the old repo those services would be triggered, I don't want that, and don't want to go through the hassle of trying to filter the service's triggers. The current version of Snippet Pixie may need a bug fix or two while I'm progressing with the rewrite, so I'd prefer to keep its repo in full working order.

    Going Forward

    So that's me now set up with plenty of work to do as part of my (almost) daily Always Developing sessions. I'm really looking forward to getting stuck into developing with Go again, and who knows what other technologies get thrown into the mix as I rebuild Snippet Pixie and its adjacent projects.

    If you want to follow along, don't forget to subscribe to my YouTube channel!

    Always Developing.show

    Thanks for reading, until next time, take care!

  • WP Table Pixie Premium discontinued

    I've just sent the following email to my list of contacts that opted in to receiving messages about WP Table Pixie…

    Hi,

    You're receiving this message because at some point you opted into getting emails from Byte Pixie (a.k.a. me, Ian M. Jones) due to your usage of or interest in the WP Table Pixie plugin.

    If you're not interested in WP Table Pixie, no worries, just delete this email as it's the last email you'll ever get about WP Table Pixie anyway! 😂

    As the subject says, I'm no longer selling WP Table Pixie. If you have an active subscription then you'll likely receive another email very soon notifying you that your subscription has been cancelled and will not be renewed when it comes due. Your license will however remain usable, it has not been cancelled.

    At this point you're probably crying inconsolably at the thought of losing WP Table Pixie. 😉

    But cry no more as the free WP Table Pixie plugin hosted on wp.org now includes all the premium features, and some bug fixes too! 🎉

    https://wordpress.org/plugins/wp-table-pixie/

    For best results I recommend deactivating any installation of WP Table Pixie Premium before activating the free version.

    When you switch to the updated free version of WP Table Pixie 1.2.0 it'll pick up your existing settings regardless of whether you've been using the premium or free version.

    Thanks to everyone that helped support the development of WP Table Pixie by paying for the premium version, you were one of the very few (hence why I'm no longer selling it) wonderful people that encouraged open source development with your cold hard cash.

    Take care,

    Ian

  • Probably not going to be able to package Snippet Pixie for the elementary 6 AppCenter

    Today I published a rather sombre Always Developing session to YouTube. In it I go over how far I've managed to get with my attempt to package Snippet Pixie as a Flatpak.

    Creating a Snippet Pixie Flatpack for elementary OS 6 AppCenter: Part 6 | Always Developing #50

    As you can tell from this post's title, and first sentence, it's not looking good for getting Snippet Pixie packaged up using Flatpak, and therefore it's unlikely to make it into elementary OS 6.0's AppCenter.

    elementary OS 6 Odin Available Now

    This is a shame as I really like elementary OS, and I especially like what the elementary project is trying to do to encourage Linux application development via a number of initiatives, including the AppCenter. And elementary OS 6 is fantastic, the amount of work that has gone into it is mind boggling, it is a truly beautiful release that all involved should be extremely proud of.

    However, the new AppCenter requires curated applications to be provided as Flatpak packages, and unfortunately Snippet Pixie uses a couple of technologies that the Flatpak sandbox will not allow as they have the potential to be abused.

    I've made no bones about the fact that I prefer Canonical's more flexible Snap package format over Flatpak, and very much wish elementary could have used Snap instead, but given their criteria I totally agree that Flatpak is the correct choice for the AppCenter.

    elementary AppCenter + Flatpak

    It's just unfortunate that Flatpak does not have the equivalent of Snap's "classic" confinement which allows for an application to be distributed as a Snap but does not impose a sandbox on it. Snap has this "classic" confinement (i.e. not confined) mode to enable certain classes of application to be distributed which Snap's current sandbox features can't yet support, or may never support. I guess that's one of the main strengths of Snap, because there is a single Snap Store managed by a trustworthy company (Canonical, makers of Ubuntu), they have the ability to vet an application that needs to break out of the sandbox to ensure it is safe. This is different to Flatpak which does not have a single source of packages (even though flathub is effectively the de-facto single source), and so the Flatpak project can't vet each package for trustworthiness. You could argue that each repository of Flatpaks should verify each new package and determine whether its permissions are appropriate, but the Flatpak project can't stop a nefarious repository from springing up that distributes compromised versions of apps. So I understand why the Flatpak project is reticent to allow various potentially dangerous sandbox permissions, or enable a non-sandboxed mode.

    Therefore Snippet Pixie is very unlikely to make it into the elementary OS 6.0 AppCenter. It is however available via the Snap Store, and nixpkgs.

    Snippet Pixie on the Snap Store

    Snippet Pixie on Nix Packages

    In the future I may explore other means of distributing Snippet Pixie. I haven't as yet tried packaging it as an AppImage, and given that up until elementary OS 6.0 the AppCenter has been using Debian packages, maybe I should investigate whether packaging for Debian is a goer too. đŸ¤ˇī¸

    I may also explore using different technologies for building Snippet Pixie seeing as I no longer have a strong incentive for using the technology stack that elementary promotes. There are some definite shortcomings in the way I built Snippet Pixie that I'd like to address now that I know better, maybe a Snippet Pixie 2.0 rewrite in a different language could be on the horizon? Having said that, the whole Vala + GTK + Granite thing is pretty sweet, there definitely could be a case made for just improving what's already there?

    Subscribe to my Always Developing YouTube channel to find out what I do next with Snippet Pixie!

    Always Developing on YouTube

  • Snippet Pixie snap fresh install fixed

    The other day I was using an Ubuntu VM and noticed that for some reason Snippet Pixie failed to run with some weird error related to its settings schema not being available. As I was mucking about with configuring an i3wm desktop I didn't really think much of it, thinking I'd likely broken something along the way.

    However, this evening I thought I'd just double check what was up with that VM and give the Snippet Pixie snap a proper test on a stock Ubuntu VM I have hanging around for just that use-case. At first all looked fine, but then I decided to fully purge the existing Snippet Pixie install and clean install it. And of course it then had the same problem.

    After much experimentation I found that some time between when Snippet Pixie 1.5.1 revision 138 was released on 2021-03-26 and the next rebuild as revision 141 was released on 2021-04-14, fresh installs no longer copied the settings schema file into place on first run.

    I suspect there was a release of snapcraft (the tool for building snap packages) that changed something, likely security related.

    I searched for anyone else having the same issue in the snapcraft forums but couldn't see anything that looked related, which made me think that it was likely then to be a problem with how I was building the Snippet Pixie snap package.

    I ran a few tests, building the snap locally and installing it in the VM, sure enough it failed to install the settings schema at runtime. The only way I could get the settings schema to install at runtime was by explicitly installing a revision before 141 from the snap store.

    I tried a few different things, looking to see if I could upgrade anything related to how snaps are built, but what with Snippet Pixie needing to be a "classic" confined (e.g. not confined) snap, I couldn't take advantage of some of the newer niceties such as the gnome-3-38 extension.

    One thing stood out when I checked the details of that gnome-3-38 extension:

    ian@ians-apollo:~ $ snapcraft extension gnome-3-38
    This extension eases creation of snaps that integrate with GNOME 3.38.
    
    At build time it ensures the right build dependencies are setup and for the
    runtime it ensures the application is run in an environment catered for GNOME
    applications.
    
    It configures each application with the following plugs:
    
    - GTK3 Themes.
    - Common Icon Themes.
    - Common Sound Themes.
    - The GNOME runtime libraries and utilities corresponding to 3.38.
    
    For easier desktop integration, it also configures each application entry with
    these additional plugs:
    
    - desktop (https://snapcraft.io/docs/desktop-interface)
    - desktop-legacy (https://snapcraft.io/docs/desktop-legacy-interface)
    - gsettings (https://snapcraft.io/docs/gsettings-interface)
    - opengl (https://snapcraft.io/docs/opengl-interface)
    - wayland (https://snapcraft.io/docs/wayland-interface)
    - x11 (https://snapcraft.io/docs/x11-interface)
    

    It mentions enabling the "gsettings" plug, which is exactly the same area that I was having problems with. This got me thinking about which libraries the snap used at build and runtime, which lead me to notice a peculiarity with the snapcraft.yaml. While the "libglib2.0-dev" library was being used during build, the equivalent "libglib2.0-0" runtime library was not being staged for install.

    So I added that library to the stage phase of the snapcraft.yaml and built and installed a local snap package from it, and it worked! đŸŽ‰ī¸

    So, long story short, there's a new build of Snippet Pixie in the snap store that should actually work!

    Snippet Pixie in the snap store

    It's a little disheartening though to think that for 6 or more weeks Snippet Pixie has not been working for new installs of the snap version, and no one either noticed it or bothered to tell me if they did. â˜šī¸

  • First Always Developing video recording failure đŸ¤Ļī¸

    Ugh, it had to happen at some point, and today was the day.

    I couldn't record my daily Always Developing session this morning as I had a couple of things to do before work, and my computer was acting up and needed some TLC anyway. So instead I recorded session #30 this evening.

    However, after finishing up a fantastic recording of me adding terminal emulator support to Snippet Pixie, I gave the mp4 file a quick preview only to find that it had no sound! â˜šī¸

    You can see me in the bottom right hand of the screen moving my lips and gesturing away, but alas my wonderfully eloquent commentary is unheard.

    I tried checking the original mkv file, but it too has no sound.

    It's a bit of a head-scratcher as I explicitly check the levels in OBS before every recording and it uses the mic directly, not the "system default". Although I do have to set the system default audio input and output devices after any reboot as otherwise it tends to pick the wrong devices, but I forgot to do that this morning when I was fixing some stuff up. I guess there's a difference between what OBS shows in the audio mixer and what is actually used for recording. đŸ¤ˇī¸

    It's quite annoying as the session went really well, and I was quite proud to be able to get Snippet Pixie working with terminals simply by holding down the Shift key when selecting a snippet from the Search and Paste window. I even prepared the 1.5.2 release on camera, which was a nice way of showing what kind of thing you need to do to release an update to the elementary OS App Center. Although I did have a problem right at the end with getting to the developer dashboard, which of course worked straight away after I finished recording.

    Once I realised that the video was duff, I decided to check all my settings and make a follow-up recording to test that my audio was working again. So in session #30.1 I briefly explain what #30 was all about and gave a quick demo of the new version. As I'd already gone ahead and started the release process of Snippet Pixie 1.5.2 to the App Center, and pushed out the snap version already, I then went on to prepare and submit the nixpkgs/NixOS PR too. So if you're at all interested in how you release an update of a simple package to nixpkgs, Always Developing #30.1 might be worth a look.

    [NO AUDIO] Adding terminal emulator support to Snippet Pixie (kinda) | Always Developing #30

    Demo of new Snippet Pixie 1.5.2 and then submit to nixpkgs/NixOS | Always Developing #30.1

    Yup, I decided to release #30 even though it has no sound, just for giggles. đŸ˜‚ī¸ This will be especially amusing to Erik, my team mate at Delicious Brains, as we have a bit of a running joke about audio problems with our daily stand-up meetings.

    The good news is that Snippet Pixie's new ability to Shift-Ctrl-V paste a snippet into the command line or application like Vim running in a terminal, got lots of use while writing this little post! Simply using Shift-Return or Shift-Click in Snippet Pixie's Search and Paste window is incredibly convenient. đŸŽ‰ī¸

  • Switched site to Gemini

    If you can see this, then I’ve successfully switched this site to be a Gemini Capsule by default.

    ianmjones.com via the Gemini protocol

    ianmjones.com via ye olde HTTPS protocol

    A few days ago I started playing with Gemini, initially writing a couple of test posts to see whether it was going to fly.

    Previous post: Is this thing on?

    Previous post: Hello Gemini World

    I encourage you to quickly check out that “Hello Gemini World” post to get a taste of how simple the Gemtext format is. It’s effectively a reduced line based Markdown format.

    A quick introduction to “gemtext” markup at Project Gemini

    The Gemtext format is very attractive to me, its incredibly easy to write and read, not only for humans, but software too.

    As noted in my previous post, I believe the format’s constraints help you concentrate on writing rather than thinking about text markup style, link placement, and images etc. With so few formatting options, the words you use have more significance.

    An incredibly appealing aspect of the Gemini protocol is its compatibility with terminal based clients (browsers if you will). I’m using one that seems to be rather popular called Amfora.

    Amfora: A fancy terminal browser for the Gemini protocol

    Over the last few weeks I’ve been using Amfora in preference to Firefox where possible to read a bunch of articles, bookmarking them and then enjoying the distraction free reading experience while having my breakfast. I’m a big fan of Instapaper, but the formatting of articles written in Gemtext is even easier to read.

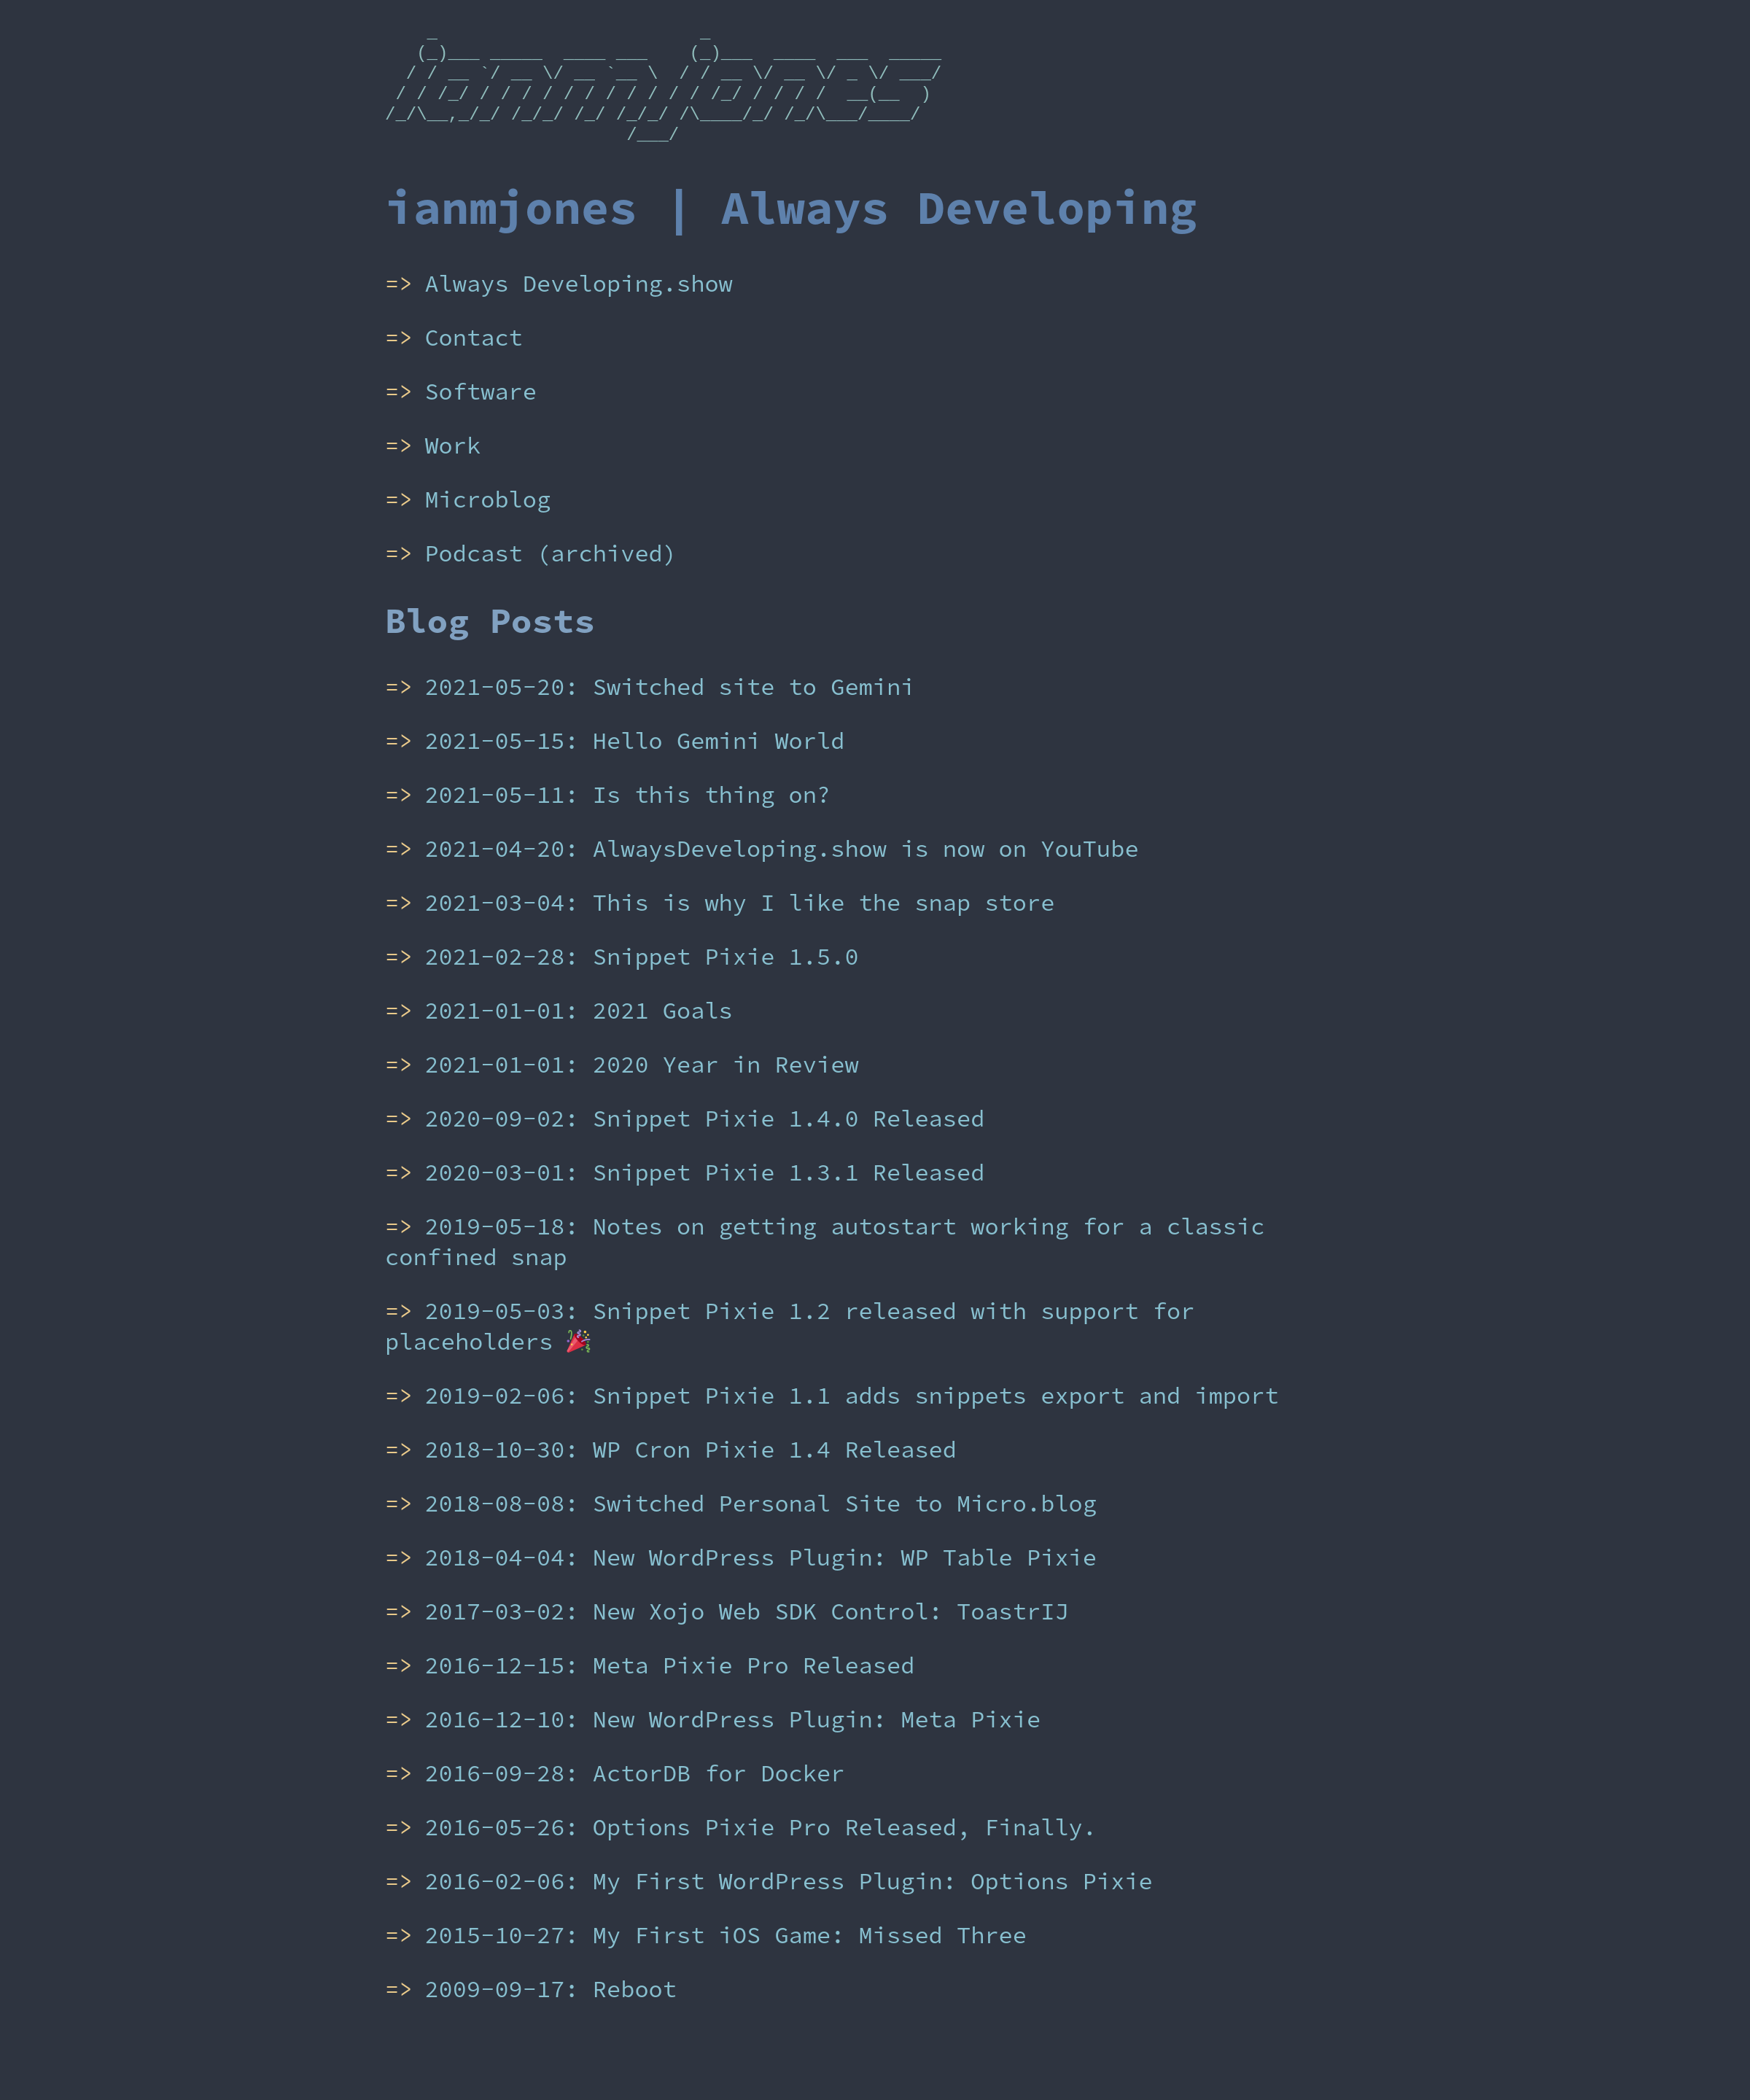
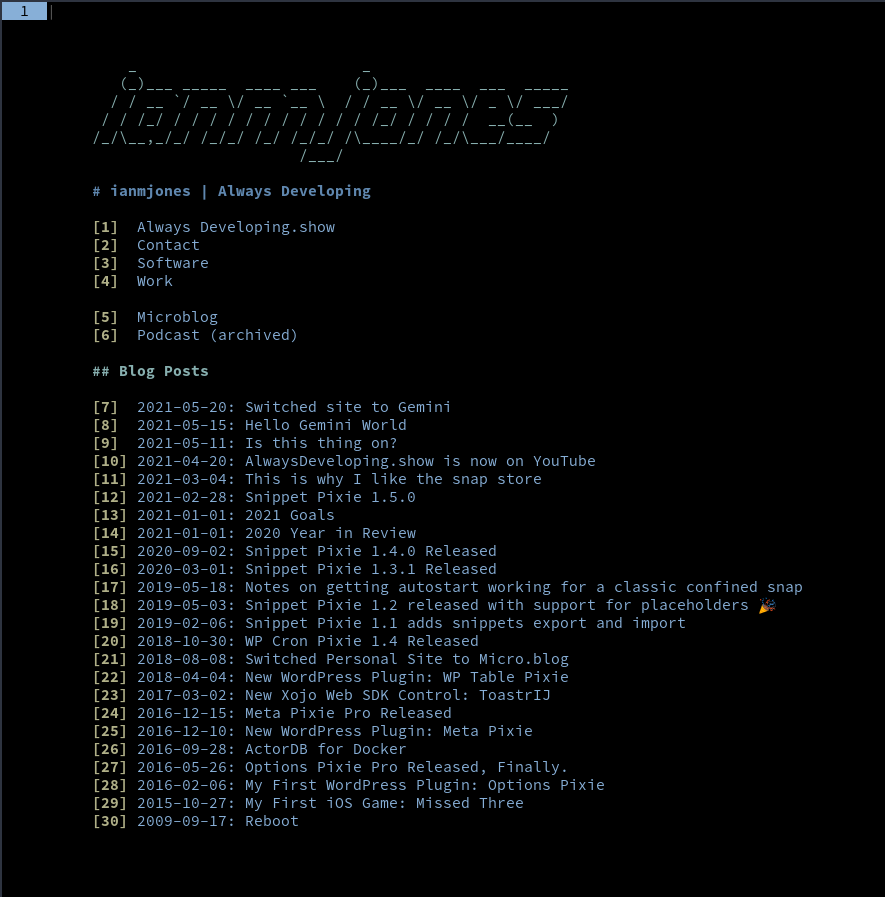
    Being keyboard driven it’s very fast to navigate sites, including just hitting a number to go to visit a link. And my site’s new home page looks lovely in Amfora, especially with a slightly modified Nord theme.

    ianmjones.com in Amfora

    Amfora Nord theme

    How it’s built

    But Ian, you didn’t just build the site in raw Gemtext did you? And how the devil am I able to see it in my web browser anyway?

    I’m glad you asked! đŸ˜‰ī¸

    This site is now built with a tool called kiln.

    kiln on sr.ht

    This is a lovely little bit of software written in Go that takes your “.gmi” files that optionally have a little bit of extra “frontmatter” at the top, mixes them with some templates, and spits out a site with nice index pages and feed files etc.

    If you look closely at the changelog for kiln you may see that the author, Adnan Maolood, was kind enough to accept a couple of bug fixes from yours’ truly.

    While kiln is relatively simple, it’s very powerful, utilising Go templates for some serious flexibility of output.

    The majority of the site’s content comes from the Markdown posts I had in the WordPress version of the site I’ve been running for a few years now.

    I backed up the site’s database with WP Migrate DB Pro, and then tar’d up all the site’s files (including the db backup) and downloaded it.

    WP Migrate DB Pro

    Then I re-hydrated just the database and extracted all the posts I wanted with a simple bit of SQL.

    I wrote a shell script that ran through those records to extract the fields I needed such as title, date and content, and then processed them to clean up the titles, content and file names as much as possible.

    The shell script included usage of a Python script called md2gemini that did the heavy lifting when it comes to removing all the stuff Gemtext doesn’t support and moving links onto their own lines.

    md2gemini on GitHub

    The result was far from perfect (mainly because of some WP encoding stuff), but helped immensely, definitely something I could work with. The shell script I wrote went through many iterations as I fine tuned the output for the different types of content I had in the WP based site, from articles to microblog posts to podcast episodes.

    Eventually I had all the posts/microblogs/podcasts output to somewhat usable gmi files that were handled well by kiln, and which I could just manually clean up pretty easily (I don’t have a huge amount of content, yet).

    With kiln you can naturally output a site that uses the Gemini protocol (gemini://) and Gemtext formatted text that Gemini browsers happily read. However, you can also pre or post process the output in a build task, and this means you can use a tool such as gmnitohtml to create a version of the site for the web.

    gmnitohtml on sr.ht

    That gmnitohtml application is also by Adnan, and works really well to convert Gemtext to HTML.

    So I built a very simple HTML template, sprinkled in some custom CSS (Nord flavoured of course), and Bob’s your uncle, out pops a nice clean no-nonsense web site.

    ianmjones.com web version

    At some point I should probably write up a tutorial on how to use kiln, might be useful to someone.

    Oh, and this site is hosted via sourcehut pages.

    sourcehut pages

    I’ve been using sourcehut for a little over a year now, very much appreciate the simplicity and power. It’s great stuff, and I’m using git.sr.ht for the site’s repo along with builds.sr.ht to build and deploy the site every time I commit a change.

    sourcehut.org

    And what’s really nice is that Gemini is fully supported, so both the Gemini and web versions of the site are hosted there and deployed at the same time.

    There’s a good chance that I missed something while re-building this site, so if you find any problems or just want to chat about Gemini or how I built the site, please drop me a line.

    My contact details.

  • Hello Gemini World

    Yup, this post has been written for my Gemini Capsule, hosted on pages.sr.ht, which also does static site hosting 😉

    Project Gemini

    Gemini Capsule hosting at pages.sr.ht

    Static site hosting at pages.sr.ht

    I'm currently investigating using Gemini as the source for my written output. As the Gemini protocol is very much about simple text rendering, it creates some nice constraints that help you focus.

    Gemtext Test

    The rest of this page shows everything allowed in Gemtext. It's really here just so that I can test styling the content when converted to HTML!

    This is normal text.

    Heading 1

    Heading 2

    Heading 3

    While links are written in the same way regardless of the URL protocol or file type, some Gemini clients show links a little differently depending on what they point to. So here's a few different URLs.

    A gemini link.

    A https link.

    An image link.

    An SVG link.

    The following is a list…

    • List item one.
    • List item two.
    • List item three.

    The following is a quote…

    Always developing

    Finally, we have pre formatted text…

       _                   _                 
      (_)__ ____  __ _    (_)__  ___  ___ ___
     / / _ `/ _ \/  ' \  / / _ \/ _ \/ -_|_-<
    /_/\_,_/_//_/_/_/_/_/ /\___/_//_/\__/___/
                     |___/                   
    

    That's all folks!