I’ve had a website of some form or another since 1998, but my oldest still available site dates back to February 2002. As I write this, that’s over 24 years ago.
I merged the content from my three archived personal sites into this current incarnation over some evenings this past week, and a chunk of time over the rainy weekend.
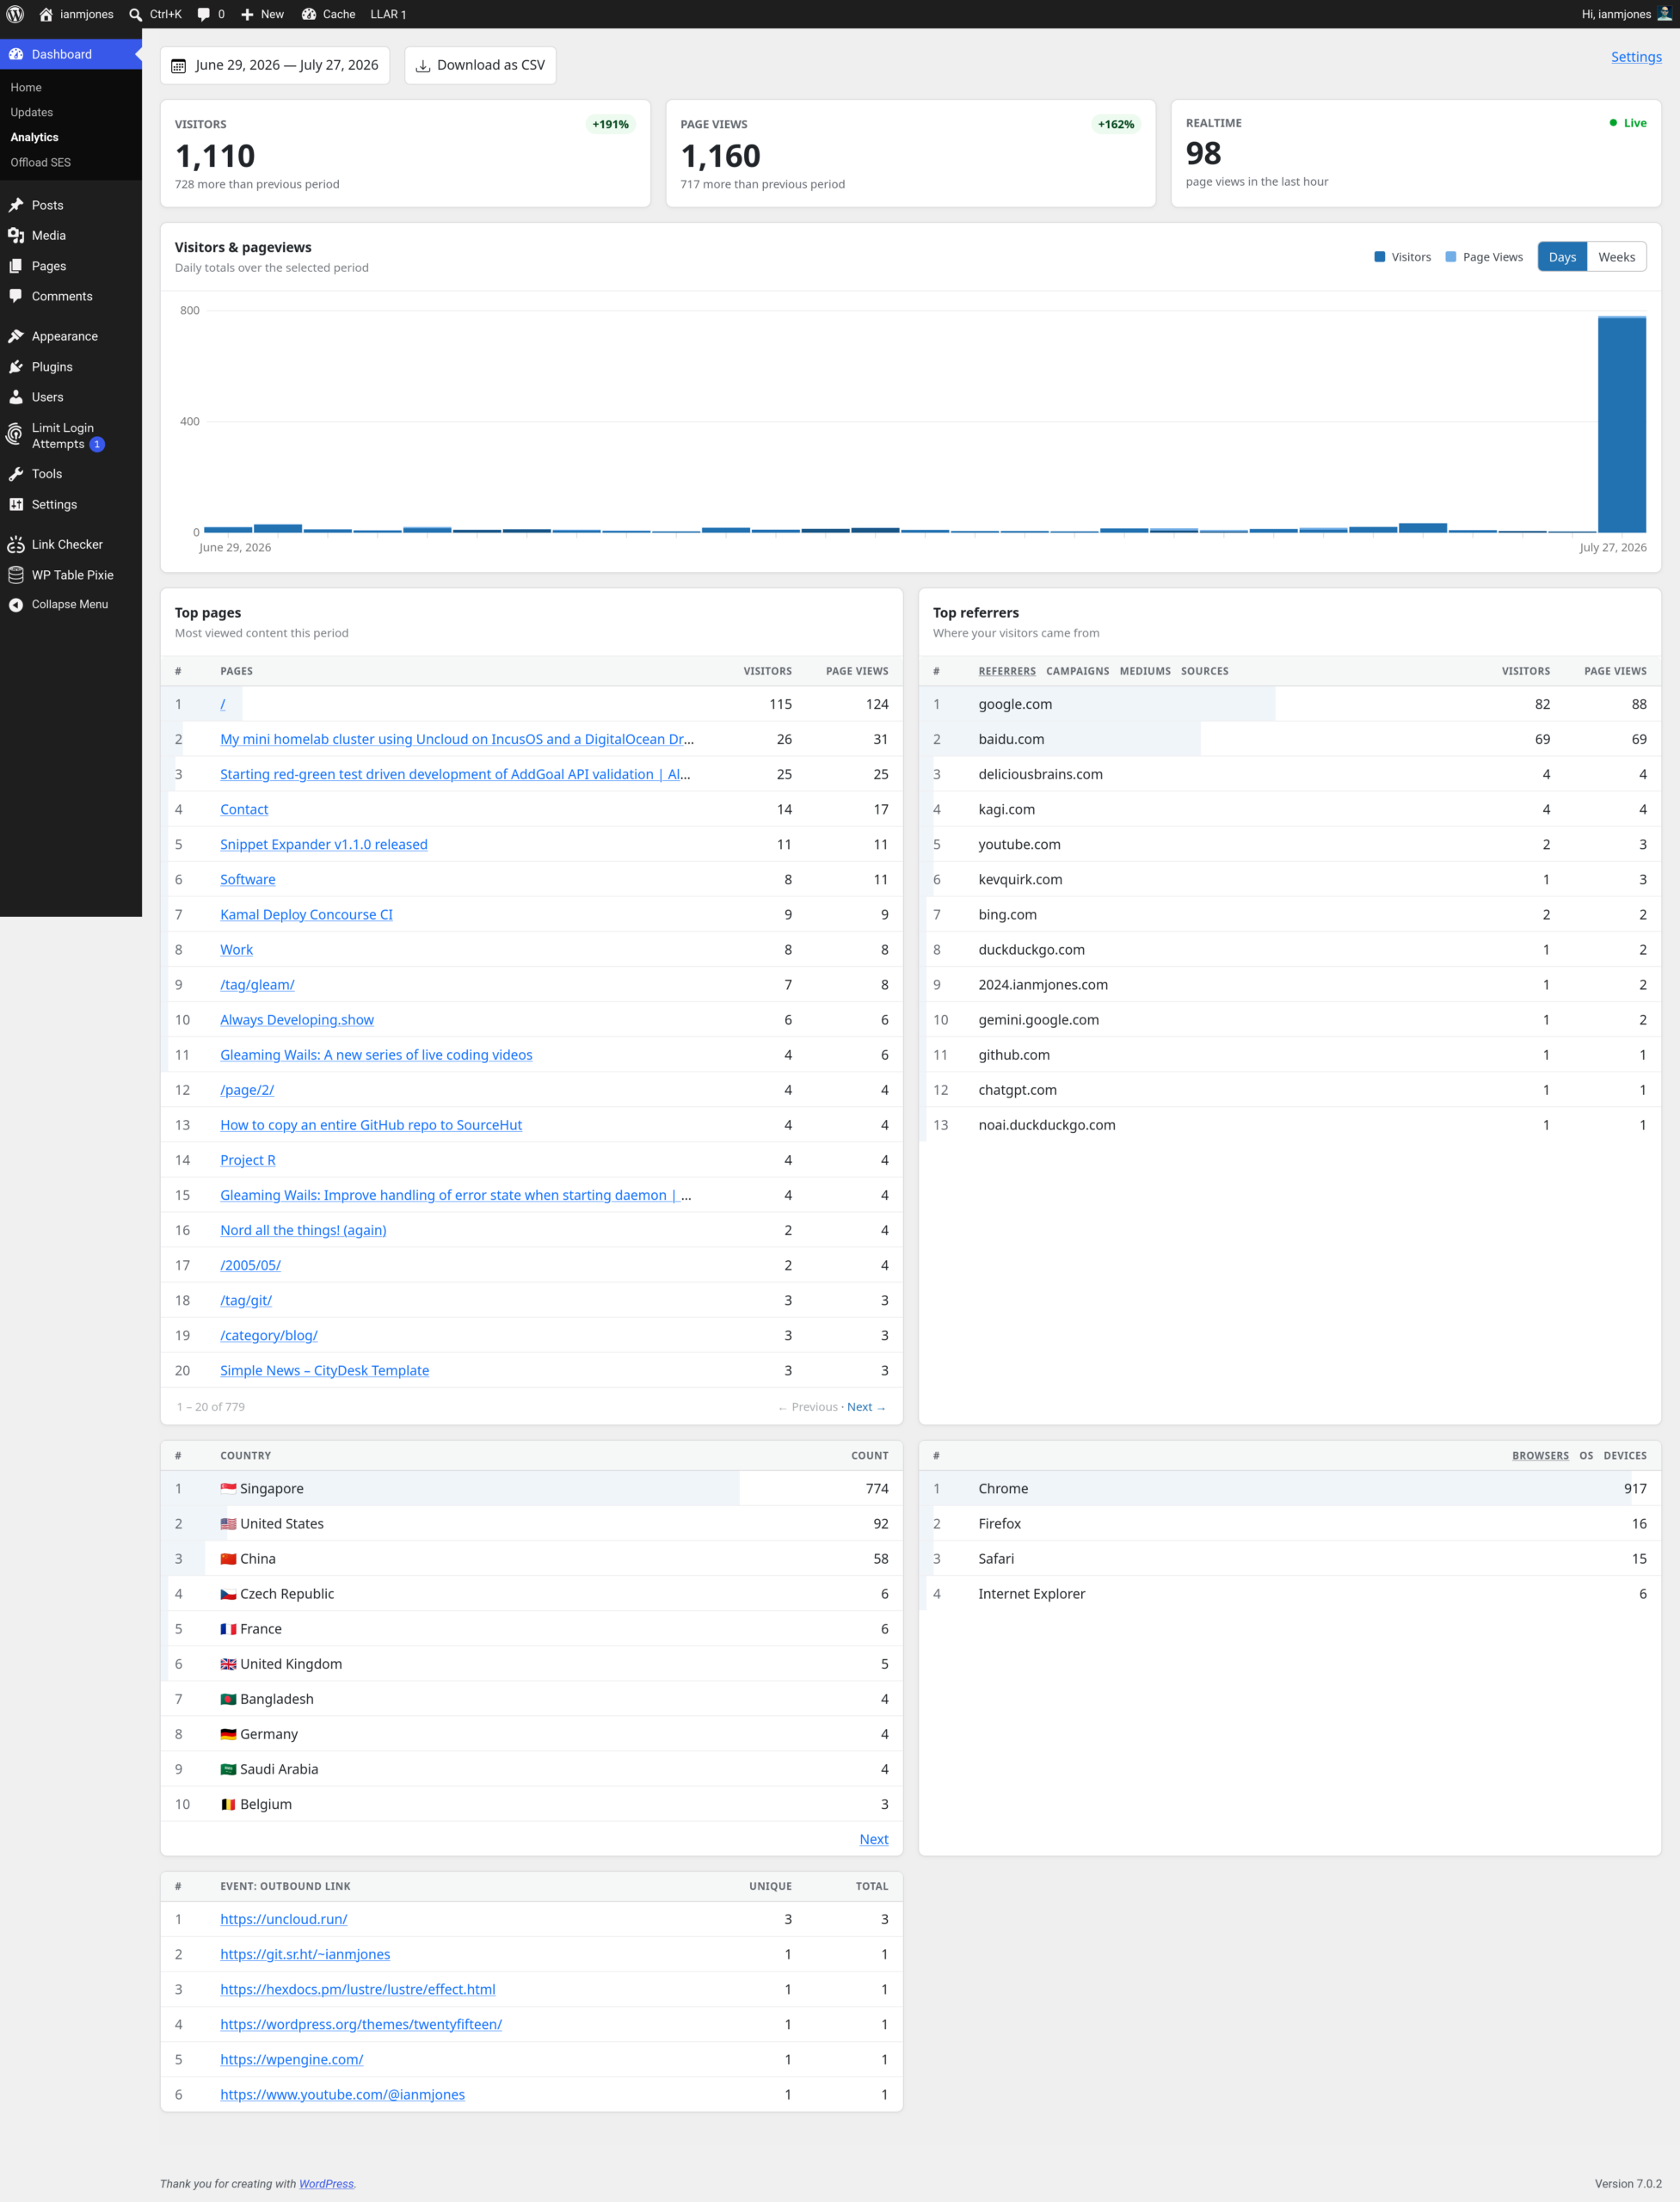
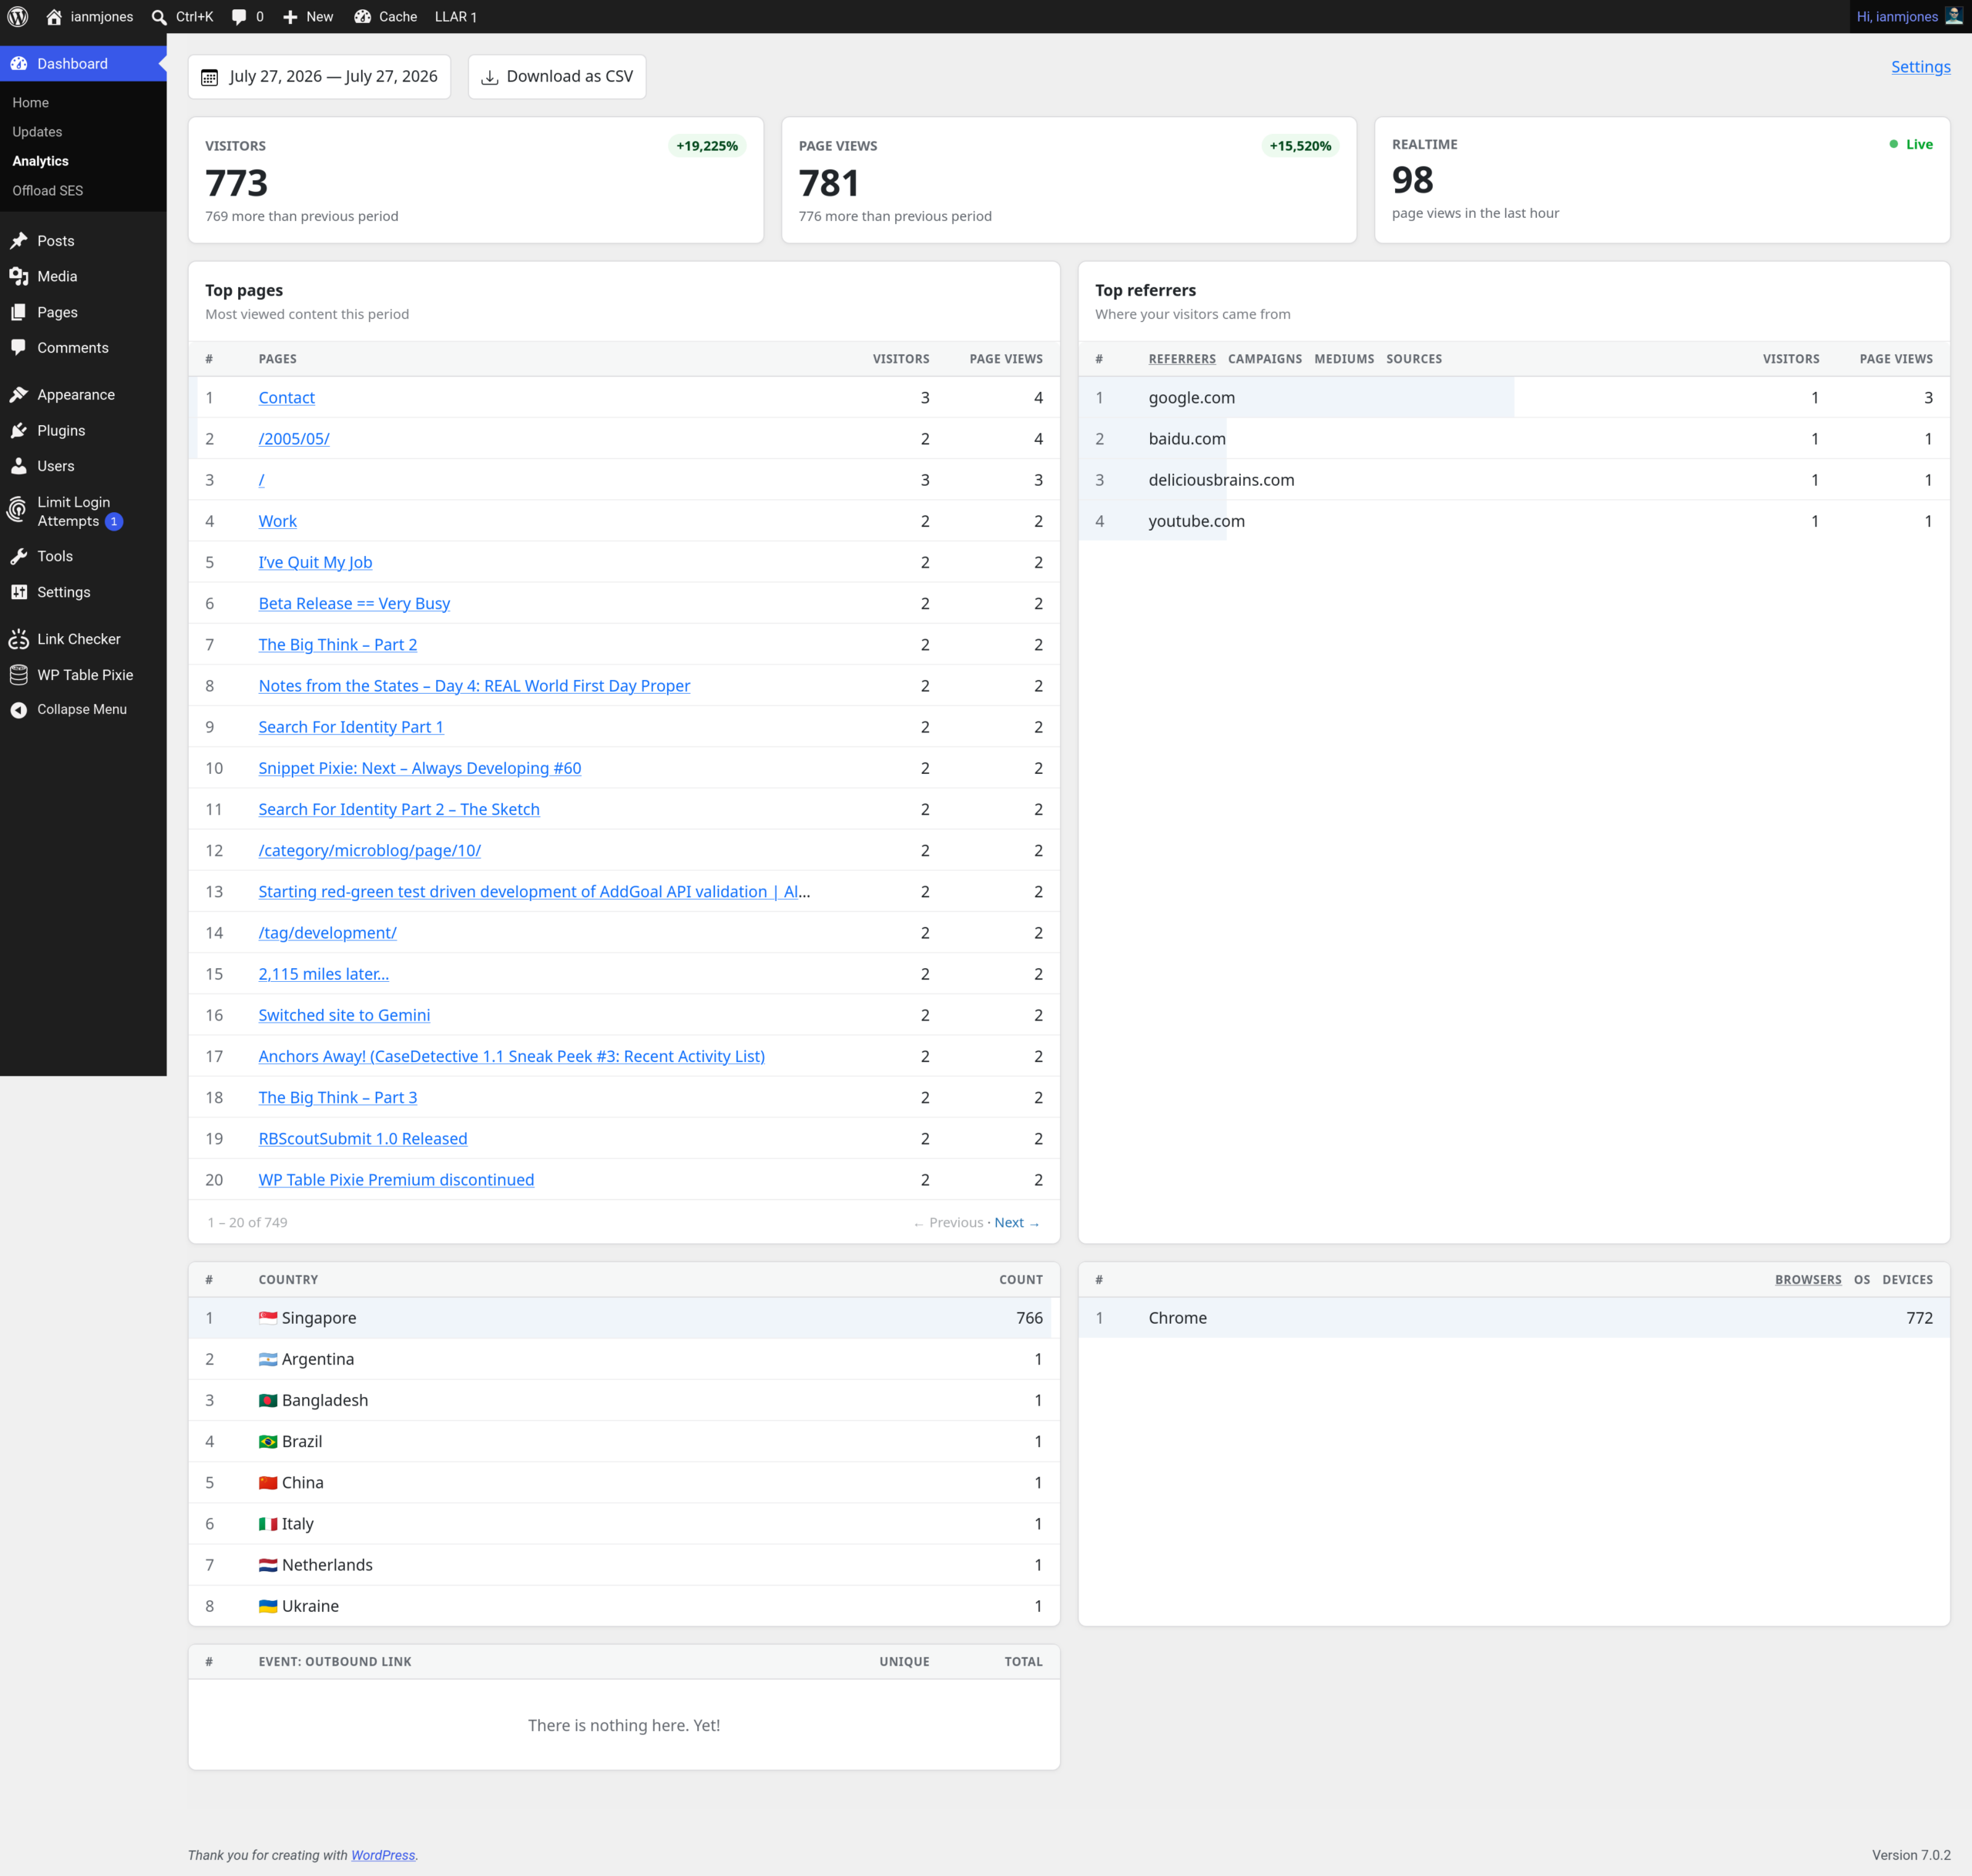
This site has now swelled from 20 posts and 3 pages, to 337 posts, 10 pages, and 289 comments!
Basically I’ve changed my mind about reinventing the site every now and then, where I’d effectively do a nuke and pave and archive the old site off to a sub-domain. I now feel that having all my old stuff together in my personal site is more valuable, and tells the story of my online presence.
It was quite a fun exercise, pulling down archives, massaging data from various sources, even generating scripts that would call wp-cli to create posts.
And of course, I used WP Migrate a ton during this project, not only for pushing and pulling between my local machines and my WP Engine hosted dev, staging and prod environments, but also for backups at various stages, and the occasional find and replace.
I’ve still got a bunch of cleanup to do, I’m pretty sure a load of posts need images relinked from when I switched to using the text only Gemini protocol, and there’s many many broken links to deal with. I also want to flesh out and better organise the archive of all my projects, but I can deal with that bit by bit as time permits.
It just feels nice to have all my stuff in one place again.