Category: Blog

  • Kamal Deploy Concourse CI

    I’ve had a bit of a soft spot for Concourse CI for quite a few years now, and recently noticed that development on the project has started to pick up again, mainly thanks to Taylor Silva.

    Concourse is a super flexible “open-source continuous thing-doer”, it’s website has a very nice and succinct high level summary of what it is:

    Centered around the simple mechanics of resources, tasks, and jobs, Concourse delivers a versatile approach to automation that excels at CI/CD.

    I decided it was a good time to have another look at Concourse, have a play with it, try and learn how to use it, and determine whether I could use it for a few projects I have in mind.

    However, I didn’t want to just spin up the Docker Compose project locally on my home office desktop computer, but rather “do it properly” and set it up on a server that I could access any time, from pretty much anywhere, cheaply.

    That however usually means messing with server configs, installing stuff, running the Concourse service and Postgres database, and of course setting up HTTPS certificates etc. It’s quite a lot of work setting up and running any service. If only there was an easier way that could be as simple to set up and maintain as that Docker Compose solution, but for setting up a VPS or something? 🤔

    Ok, you got me, it’s right there in the title of this post, Kamal is the perfect solution for this! It’s a way of setting up a Docker based service on a server, and it takes care of certificates and doing things like switching users to the new version of the app on deploy, rollbacks, and running multiple services on the same server etc. It also manages secondary services, what it calls “accessories”, e.g. databases, caches etc.

    In the rest of this article I’m going to show you step by step how I deployed my own Concourse server via Kamal, and ran my first “Hello, World!” pipeline to make sure it worked.

    However, this is not an exhaustive guide, just a summary. I’m assuming you’re someone who knows what a VPS is and how to create one somewhere like DigitalOcean (affiliate link giving new customers $200 free credit for 60 days), is comfortable with Docker and git, and of course, has a good idea as to what CI/CD are and why you’d want to use them.

    Also, this is probably a really bad way of setting up a Concourse server for your team! You’ll probably want something way more robust, with more workers, and especially when it comes to setting up the database so that there’s less chance of it going away, including setting up a secondary db server etc. For me this is a neat little server to play with, your mileage may vary.

    Spin up a VPS

    To deploy Concourse using Kamal, I needed somewhere to host it.

    I just created a Droplet on DigitalOcean in their London region, because I’m in the UK.

    Picking London region for DigitalOcean Droplet.

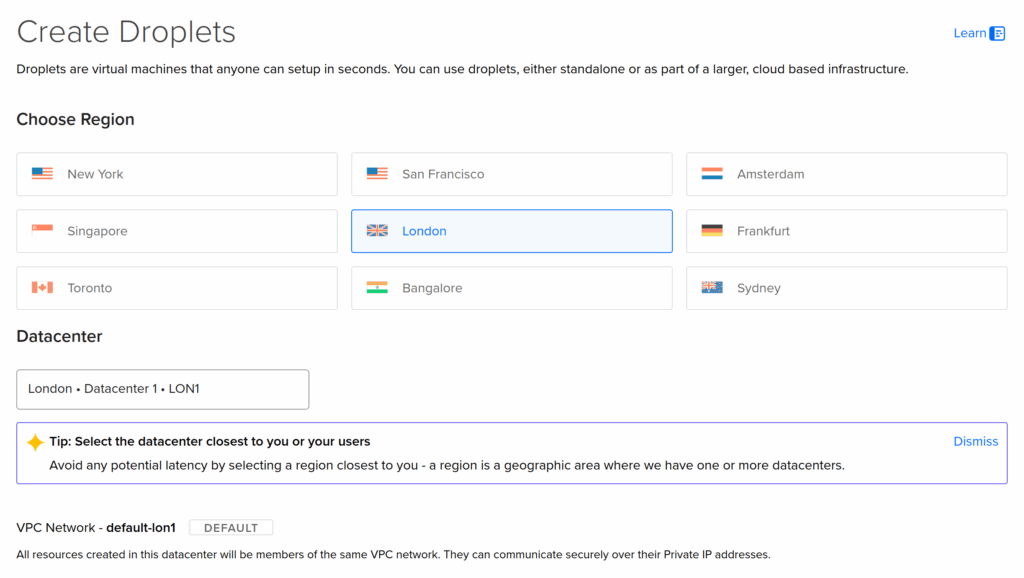
    You should use the latest Ubuntu LTS (long term support) as the operating system to have the smoothest experience with Kamal. When I created my server, that was Ubuntu 24.04 LTS.

    Selecting Ubuntu 24.04 LTS for Droplet's operating system.

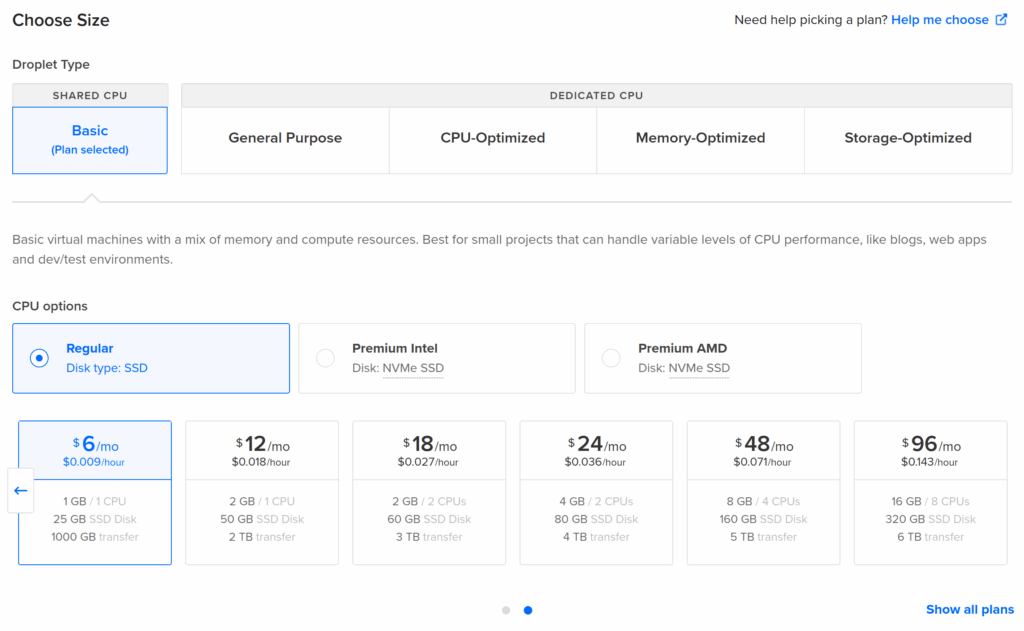
    For the size of the VPS, because I’m just playing with Concourse and learning how to use it for now, I just used the smallest available, which was just $6 per month on DigitalOcean when I created it. There’s a good chance that some time in the future I’ll want to upgrade that VPS, which is easy to do on DigitalOcean, but that can wait until I actually need to.

    Cheaping out and picking the smallest Droplet size.

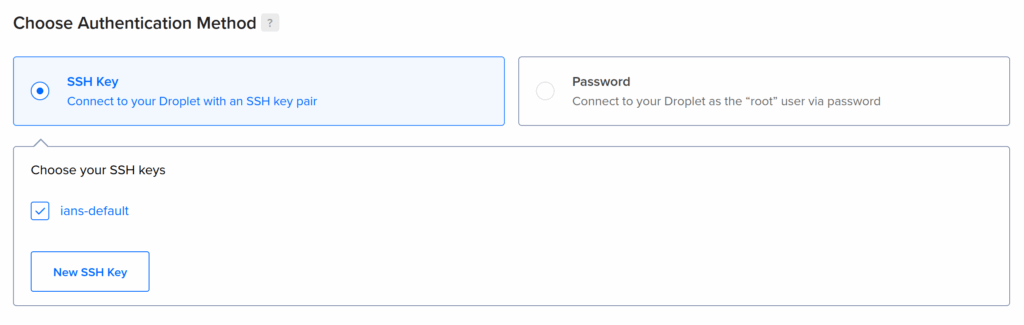
    You should also make sure that your personal public SSH key is automatically installed on the server so that Kamal can securely deploy to the server without needing a password to be typed in multiple time etc.

    Making sure to select an SSH key to be automatically added to the new VPS.

    Once my server was up and running, I took note of its IP address and pointed a DNS record at it to make it easier to access, and also easier to remember when creating the config for Kamal.

    In my case, I used ci.ianmjones.com for how I access Concourse, but because I might add a couple more test projects to the server, I called it test.ianmjones.com and then added ci.ianmjones.com as a CNAME record.

    sr.ht/ianmjones/kamal-deploy-concourse-ci
    ❯ dig ci.ianmjones.com
    ci.ianmjones.com.       60      IN      CNAME   test.ianmjones.com.
    test.ianmjones.com.     60      IN      A       159.223.244.189

    Create the project directory and Dockerfile

    Kamal needs somewhere to store config files. Normally that would be within your web app project’s source, but in my case I just wanted a clean project purely for deploying Concourse CI:

    mkdir kamal-deploy-concourse-ci
    cd kamal-deploy-concourse-ci

    Kamal needs a Dockerfile to run as the main service, so I created a file in my project called Dockerfile with the following contents:

    FROM concourse/concourse

    All I’m doing is using Concourse’s Docker image as the base, we don’t need to add anything else.

    This is done because Kamal builds an image from the Dockerfile, stores that in your registry of choice, e.g. Docker Hub, and then pulls that to your server during deployment. Whenever you use Kamal to deploy the latest version of a project, it’ll create a new version of the Docker image for your service, tagged with the project’s latest git commit hash to then deploy. This mechanism makes it pretty easy to see exactly what version of your project has been deployed, and of course this helps should you need to roll back to a previous version.

    Install and initialize Kamal

    After making sure I had a recent version of Ruby installed, I installed the Kamal Ruby Gem, and then created the Kamal config files with its init command:

    gem install kamal
    kamal init

    This resulted in a few files created within the new directory:

    sr.ht/ianmjones/kamal-deploy-concourse-ci
    ❯ tree -a
    .
    ├── config
    │   └── deploy.yml
    ├── Dockerfile
    └── .kamal
        ├── hooks
        │   ├── docker-setup.sample
        │   ├── post-app-boot.sample
        │   ├── post-deploy.sample
        │   ├── post-proxy-reboot.sample
        │   ├── pre-app-boot.sample
        │   ├── pre-build.sample
        │   ├── pre-connect.sample
        │   ├── pre-deploy.sample
        │   └── pre-proxy-reboot.sample
        └── secrets
    
    4 directories, 12 files

    Apart from the Dockerfile I created, the only other files that I’m going to be messing with are config/deploy.yml and .kamal/secrets, the files in .kamal/hooks I’ll talk about in a future post. 😉

    config/deploy.yml

    The config/deploy.yml file is where we define the shape of our project to be deployed by Kamal.

    In the following sub-sections I’m going to show a small section of the updated config/deploy.yml file, with comments intact, and then explain what I changed from the version created by Kamal afterwards.

    I liberated a lot of the Concourse specific config from the Docker Compose project for Concourse.

    Service Config

    # Name of your application. Used to uniquely configure containers.
    service: ci
    
    # Name of the container image.
    image: ianmjones/ci
    
    # Deploy to these servers.
    servers:
      web:
        hosts:
          - test.ianmjones.com
        options:
          privileged: true
          cgroupns: host
        cmd: quickstart

    I called my service “ci“, seemed appropriate!

    The Docker image will be created in my “ianmjones” Docker Hub account, and will be called “ci“.

    You must create a “web” server role for Kamal to use as the main entrypoint into the app.

    My service is going to be deployed to the “test.ianmjones.com” host (my DigitalOcean Droplet I created earlier).

    Now comes a couple of Concourse specific changes that I needed …

    For Concourse to be able to run its workers, its container must be privileged.

    For the same reason, the Concourse container needs to run in the host cgroup namespace.

    The concourse command that is called by the container’s ENTRYPOINT, needs to know which mode it is running in. I supplied the argument “quickstart” via CMD to set up a simple all-in-one Concourse node.

    # Enable SSL auto certification via Let's Encrypt and allow for multiple apps on a single web server.
    # Remove this section when using multiple web servers and ensure you terminate SSL at your load balancer.
    #
    # Note: If using Cloudflare, set encryption mode in SSL/TLS setting to "Full" to enable CF-to-app encryption.
    proxy:
      ssl: true
      host: ci.ianmjones.com
      # Proxy connects to your container on port 80 by default.
      app_port: 8080
      # Need to change from the default healthcheck path of /up.
      healthcheck:
        path: /

    Kamal’s proxy acts like a mini router, handing the HTTPS certificate termination and renewals, and routing traffic to the appropriate container. There’s only one Kamal proxy per server, and if you use Kamal to deploy multiple projects it’ll be updated to route traffic and handle certificates for them all. You can however disable the certificate handling if you’re using a load balancer in front of your servers that already handles your certificate renewals and termination duties. I’m not, so I kept ssl turned on.

    For this project I want it to handle certificates, and use “ci.ianmjones.com” as the public host name for the service.

    The Concourse container exposes port 8080 by default, so we have to specify that rather than use the default of 80 that the proxy will otherwise use.

    By default the proxy will hit a /up endpoint on your container to check whether it returns a 200 HTTP status, but the Concourse container doesn’t have that endpoint. So I changed the healthcheck to just whack / instead. You could instead use /api/v1/info like they do in the Concourse Helm Chart.

    # Credentials for your image host.
    registry:
      # Specify the registry server, if you're not using Docker Hub
      # server: registry.digitalocean.com / ghcr.io / ...
      username: ianmjones
    
      # Always use an access token rather than real password (pulled from .kamal/secrets).
      password:
        - KAMAL_REGISTRY_PASSWORD
    
    # Configure builder setup.
    builder:
      arch: amd64

    As mentioned previously, Kamal needs to build and store a Docker image for your project in a container registry that it can access from the server it’s going to deploy to.

    In my case I’m just using the default Docker Hub registry, so I just supply my “ianmjones” user name there.

    Kamal is going to want to create a private image in the registry, which happens via your local login to your registry when it uses docker push etc. However, it then later needs to pull that private image down to the server, so I needed to supply a password for that.

    It’s best to create an access token on your registry for just Kamal to use, just in case something happens and you need to revoke it. Then you should use Kamal’s secrets functionality to securely store and retrieve that token.

    Here I’m using a variable called KAMAL_REGISTRY_PASSWORD to supply the password (API token) for Kamal to use when pulling the private container image. When we get to talking about the .kamal/secrets file you’ll see how that all works.

    I’m deploying to a server that runs as an amd64 architecture machine, so here I’ve left the builder section in its default config for that.

    # Inject ENV variables into containers (secrets come from .kamal/secrets).
    #
    env:
      clear:
        CONCOURSE_POSTGRES_HOST: ci-db
        CONCOURSE_POSTGRES_USER: concourse_user
        CONCOURSE_POSTGRES_DATABASE: concourse
        CONCOURSE_EXTERNAL_URL: https://ci.ianmjones.com
        CONCOURSE_MAIN_TEAM_LOCAL_USER: ianmjones
        CONCOURSE_WORKER_BAGGAGECLAIM_DRIVER: overlay
        CONCOURSE_X_FRAME_OPTIONS: allow
        CONCOURSE_CLUSTER_NAME: imj-ci
        CONCOURSE_WORKER_CONTAINERD_DNS_SERVER: "8.8.8.8"
        CONCOURSE_WORKER_RUNTIME: "containerd"
      secret:
        - CONCOURSE_POSTGRES_PASSWORD
        - CONCOURSE_CLIENT_SECRET
        - CONCOURSE_TSA_CLIENT_SECRET
        - CONCOURSE_ADD_LOCAL_USER

    The env section is where I actually configured Concourse, if you’ve looked at the Docker Compose file from Concourse’s quick start guide, you’re going to see a lot of familiar entries. 😄

    As such, I’m just going to explain the bits that differ, or might be Kamal specific.

    You’ll notice there’s two subsections, clear and secret. As you might imagine, anything that is at all sensitive should go in the secret section, and will get its value via Kamal’s secrets functionality, which we’ll get to in a minute when we talk about the .kamal/secrets file.

    CONCOURSE_POSTGRES_HOST: ci-db

    The host for the Postgres database server has been called “ci-db“. This name comes from what I’ve called the database server accessory in the next section we’ll talk about, and how Kamal sets up its internal networking for the containers to be prefixed with the main service’s name. As my service is called “ci“, and I’ve called the accessory “db“, we get a network name for the database server of “ci-db“.

    CONCOURSE_EXTERNAL_URL: https://ci.ianmjones.com

    I’m specifying an external URL for Concourse to use so that the web UI works properly, and creates URLs and redirects that know the UI is being accessed at https://ci.ianmjones.com.

    CONCOURSE_MAIN_TEAM_LOCAL_USER: ianmjones

    You need a user name to log into Concourse with, I’m using “ianmjones“, you should probably use something else! 😄

    This variable tells Concourse that my username belongs to the special admin “main” team. I’ll actually define my username in the secret section.

    CONCOURSE_CLUSTER_NAME: imj-ci

    This is an optional name for your Concourse cluster, to be shown in the web UI. You don’t have to add this variable, but it’s a handy reminder should you end up with a few Concourse instances. I named my cluster “imj-ci” to keep it short, and yet distinct from any other cluster I may end up creating in the future.

    CONCOURSE_POSTGRES_PASSWORD

    This tells Concourse what the password is for the Postgres database I’m going to set up in the accessories section, stay tuned for that.

    CONCOURSE_CLIENT_SECRET & CONCOURSE_TSA_CLIENT_SECRET

    These are part of the security Concourse uses to ensure that the worker scheduler and workers are authorised to do their thing. That kind of detail is way out of scope for this article, but the Concourse site has plenty information on the internals and secret keys. At first I just used the values from the Docker Compose example.

    CONCOURSE_ADD_LOCAL_USER

    By default this is shown in the Docker Compose file as “test:test”, creating a “test” user with password “test”. As I’m deploying this to a publicly accessible server, I figured I’d use something a little more secure! 😄

    When we come to talking about the .kamal/secrets file you’ll see how I populate this variable with my “ianmjones” user name and generated password.

    # Use accessory services (secrets come from .kamal/secrets).
    #
    accessories:
      db:
        image: postgres
        host: test.ianmjones.com
        env:
          clear:
            POSTGRES_DB: concourse
            POSTGRES_USER: concourse_user
            PGDATA: /database
          secret:
            - POSTGRES_PASSWORD
        directories:
          - data:/database

    This is the final section, where I defined the “db” accessory that Kamal will stand up if not present, but will be careful with otherwise. Unlike the main service that is expected to be ephemeral and can be rebooted and replaced as needed, accessories are treated as semi-external services that don’t get routinely upgraded. Kamal does have a bunch of commands you can use to manage them though.

    As you might expect, I’m deploying a “postgres” container image for my “db” service.

    I’m also deploying this db accessory to the same “test.ianmjones.com” server where my main ci service is, but apparently you don’t have to if you want to run multiple servers.

    The env entries are pretty self explanatory, setting the Postgres database name and username, where the database data will store its files inside the container, and the Postgres database user’s password that will be grabbed via a Kamal secret.

    For when I reboot the server, or upgrade the Postgres database accessory, I need the database data to be persisted outside of the otherwise ephemeral container. In the directories section I specify that a Docker volume called “data” should be created and mounted as /database inside the container to match where I specified that Postgres will store its database files. This is ok for me at the moment while I play with Concourse, but for a more robust solution it might be better to create an independent storage volume in your hosting provider that can be attached to the server and its mounted path used instead of the data volume specified here. You may also forgo using an accessory at all, and instead maybe use a hosting provider managed database server or similar.

    Minimal config/deploy.yml

    Here’s the config/deploy.yml file as one without all the comments:

    service: ci
    image: ianmjones/ci
    
    servers:
      web:
        hosts:
          - test.ianmjones.com
        options:
          privileged: true
          cgroupns: host
        cmd: quickstart
    
    proxy:
      ssl: true
      host: ci.ianmjones.com
      app_port: 8080
      healthcheck:
        path: /
    
    registry:
      username: ianmjones
      password:
        - KAMAL_REGISTRY_PASSWORD
    
    builder:
      arch: amd64
    
    env:
      clear:
        CONCOURSE_POSTGRES_HOST: ci-db
        CONCOURSE_POSTGRES_USER: concourse_user
        CONCOURSE_POSTGRES_DATABASE: concourse
        CONCOURSE_EXTERNAL_URL: https://ci.ianmjones.com
        CONCOURSE_MAIN_TEAM_LOCAL_USER: ianmjones
        CONCOURSE_WORKER_BAGGAGECLAIM_DRIVER: overlay
        CONCOURSE_X_FRAME_OPTIONS: allow
        CONCOURSE_CONTENT_SECURITY_POLICY: "frame-ancestors *;"
        CONCOURSE_CLUSTER_NAME: imj-ci
        CONCOURSE_WORKER_CONTAINERD_DNS_SERVER: "8.8.8.8"
        CONCOURSE_WORKER_RUNTIME: "containerd"
      secret:
        - CONCOURSE_POSTGRES_PASSWORD
        - CONCOURSE_CLIENT_SECRET
        - CONCOURSE_TSA_CLIENT_SECRET
        - CONCOURSE_ADD_LOCAL_USER
    
    accessories:
      db:
        image: postgres
        host: test.ianmjones.com
        env:
          clear:
            POSTGRES_DB: concourse
            POSTGRES_USER: concourse_user
            PGDATA: /database
          secret:
            - POSTGRES_PASSWORD
        directories:
          - data:/database

    If you copy and paste the above into your own config/deploy.yml file, remember to make replacements on any line with “ianmjones” or “imj”!

    .kamal/secrets

    Now I just needed to supply values for all the secret variables in config/deploy.yml.

    here’s my complete .kamal/secrets file, where I’m using 1Password to store my secrets in a couple of items, and using Kamal’s built-in 1password adapter to retrieve them:

    # Secrets defined here are available for reference under registry/password, env/secret, builder/secrets,
    # and accessories/*/env/secret in config/deploy.yml. All secrets should be pulled from either
    # password manager, ENV, or a file. DO NOT ENTER RAW CREDENTIALS HERE! This file needs to be safe for git.
    
    # Option 1: Read secrets from the environment
    ###KAMAL_REGISTRY_PASSWORD=$KAMAL_REGISTRY_PASSWORD
    
    # Option 2: Read secrets via a command
    # RAILS_MASTER_KEY=$(cat config/master.key)
    
    # Option 3: Read secrets via kamal secrets helpers
    # These will handle logging in and fetching the secrets in as few calls as possible
    # There are adapters for 1Password, LastPass + Bitwarden
    #
    # SECRETS=$(kamal secrets fetch --adapter 1password --account my-account --from MyVault/MyItem KAMAL_REGISTRY_PASSWORD RAILS_MASTER_KEY)
    # KAMAL_REGISTRY_PASSWORD=$(kamal secrets extract KAMAL_REGISTRY_PASSWORD $SECRETS)
    # RAILS_MASTER_KEY=$(kamal secrets extract RAILS_MASTER_KEY $SECRETS)
    
    DOCKER_SECRETS=$(kamal secrets fetch --adapter 1password --account ianmjones --from Private/Docker KAMAL_REGISTRY_PASSWORD)
    KAMAL_REGISTRY_PASSWORD=$(kamal secrets extract KAMAL_REGISTRY_PASSWORD $DOCKER_SECRETS)
    
    SECRETS=$(kamal secrets fetch --adapter 1password --account ianmjones --from Private/imj-ci POSTGRES_PASSWORD CONCOURSE_CLIENT_SECRET CONCOURSE_TSA_CLIENT_SECRET CONCOURSE_ADD_LOCAL_USER)
    POSTGRES_PASSWORD=$(kamal secrets extract POSTGRES_PASSWORD $SECRETS)
    CONCOURSE_POSTGRES_PASSWORD=$POSTGRES_PASSWORD
    CONCOURSE_CLIENT_SECRET=$(kamal secrets extract CONCOURSE_CLIENT_SECRET $SECRETS)
    CONCOURSE_TSA_CLIENT_SECRET=$(kamal secrets extract CONCOURSE_TSA_CLIENT_SECRET $SECRETS)
    CONCOURSE_ADD_LOCAL_USER=$(kamal secrets extract CONCOURSE_ADD_LOCAL_USER $SECRETS)

    As you can see from the file’s comments, you can instead use environment variables or plain shell commands to grab the values for your secrets, or another adapter other than 1Password’s.

    In my case I’ve got two items in 1Password, one for where I store the Docker Hub related secrets, and another specific to this project.

    I’ll not go into the details here, but you can see that for the KAMAL_REGISTRY_PASSWORD secret environment variable I fetch the Docker Hub API token I created specially for use with this Kamal project from a 1Password item called “Docker” within my “Private” vault, and then extract the value into the env var.

    For all the service and accessory specific secrets, they’re all stored in an “imj-ci” 1Password item, in the same “Private” vault.

    You’ll notice that the POSTGRES_PASWORD variable does double duty to also set the required CONCOURSE_POSTGRES_PASSWORD.

    For the CONCOURSE_ADD_LOCAL_USER entry, I actually generated another password field, and then copied its value into another field called CONCOURSE_ADD_LOCAL_USER with “ianmjones:” prefixed to the value. But in hindsight, I could have just fetched the original password field and concatenated it to “ianmjones:” when creating the CONCOURSE_ADD_LOCAL_USER env var within the secrets file. 🤷

    Git commit

    Because Kamal uses a git commit hash for tagging the Docker image it then deploys to the server, I needed to set up my project for git, and commit all the files.

    git init .
    git add .
    git commit -m "Deploy Concourse CI with Kamal"

    It’s optional, but highly recommended, to push your project to a remote git repository so that you have a copy of your project saved somewhere other than on you development machine.

    In my case, I created a private repo on SourceHut, set that as the remote origin, and pushed to it.

    git remote add origin git@git.sr.ht:~ianmjones/kamal-deploy-concourse-ci
    git push --set-upstream origin trunk

    Kamal Deploy!

    Now it was time to actually deploy Concourse CI to the server via Kamal.

    kamal setup

    As this is the first deploy, Kamal needs to set up the server with Docker, create the proxy container, create the accessory container, as well as the main container of the web project, so it’s going to take considerably longer than when you’re later just deploying changes to your project.

    Here’s a video of what it looked like when I deployed ci.ianmjones.com for the first time.

    There’s a couple of noticeable stalls, one where Docker is being set up on the new server, and another where the Docker image is being pulled down from Docker hub to the server. It still only took 2 minutes for me though, but your first deploy may take longer as the Concourse Docker image will need to be pulled down to your machine during the build of the image that then gets pushed to the container registry.

    When the setup finished, I had a shiny new Concourse CI server with a web UI I could visit at https://ci.ianmjones.com!

    Concourse CI web UI before login, showing welcome and instructions for downloading the CLI tool.

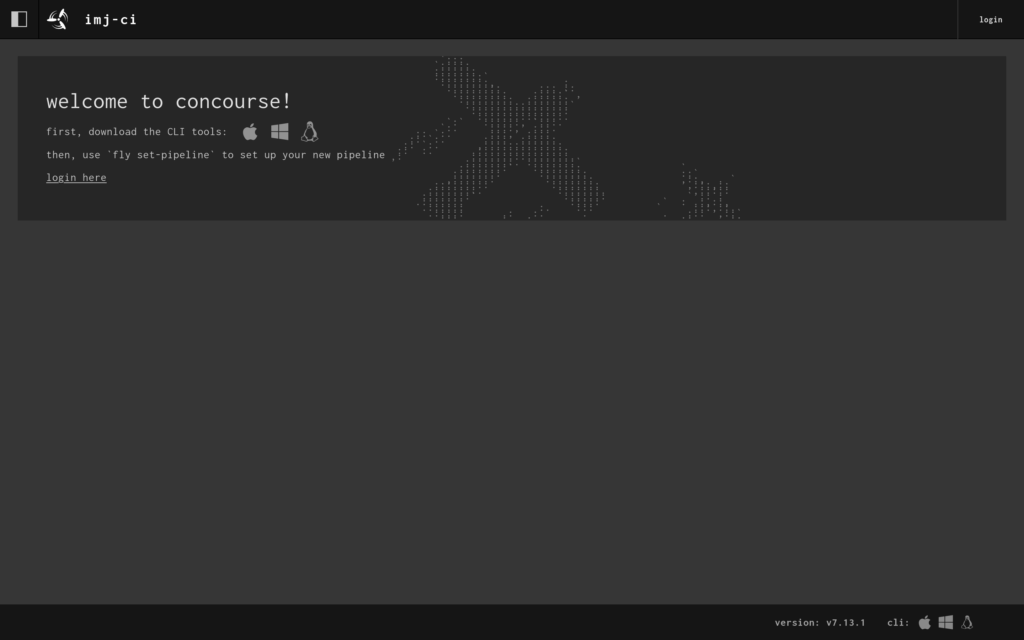
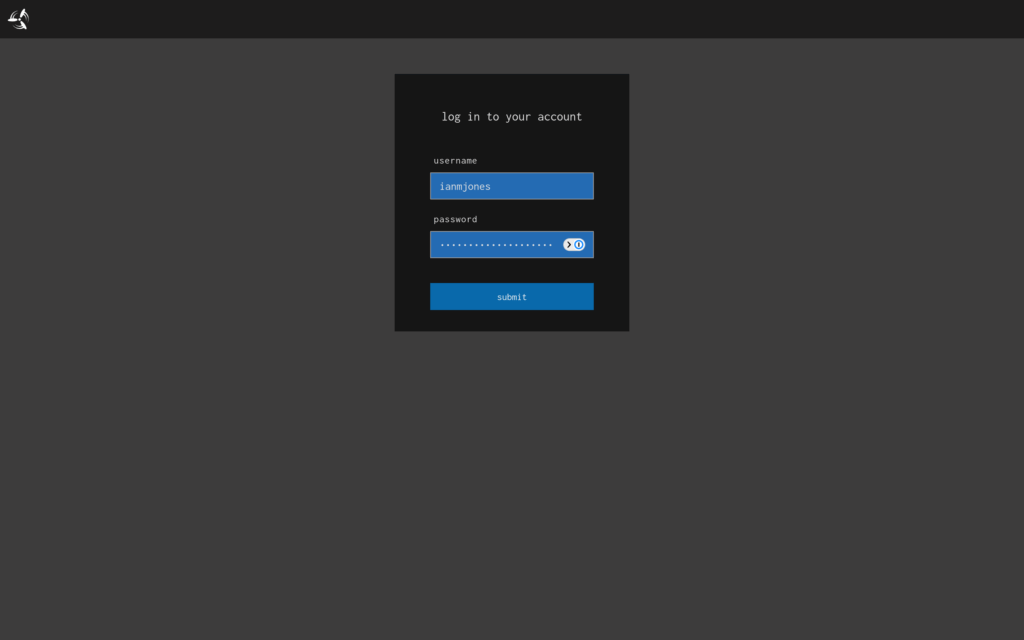
    I was then able to log into the web app …

    Login form for Concourse CI web app.

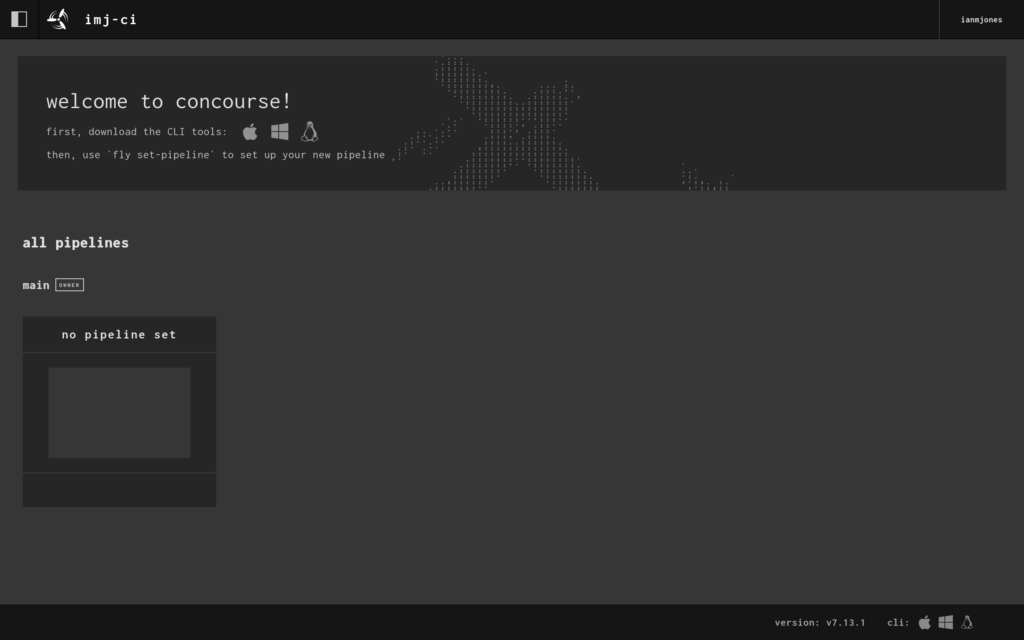
    … but there wasn’t much to see as I’d not created any pipelines yet.

    Logged in to Concourse CI web app but there's no pipelines being shown yet.

    Now that I’ve done my first deploy with Kamal that sets up the server and ancillory containers, from now on, if I make any further changes to my kamal-deploy-concourse-ci project, I’ll only need to commit the changes and kamal deploy rather than kamal setup.

    git add .
    git ci -m "Wibble the widget"
    kamal deploy

    Get fly CLI

    In the web UI you’ll see a welcome panel because there aren’t any pipelines yet, it tells you to download the CLI tool for your operating system by clicking on the appropriate icon. In my case, that’s Linux, so the little penguin got clicked, but you may need to click the Apple or Windows icon.

    I then made sure the downloaded fly binary was executable, and moved it into a directory I know is on my PATH.

    chmod +x ~/Downloads/fly
    mv ~/Downloads/fly ~/bin/fly

    hello-world pipeline

    Then it was time to create a super simple “Hello, World!” pipeline to check that Concourse CI was actually working and can run jobs on its workers.

    I highly recommend following the Concourse CI Getting Started guide. As I’ve now got my server set up though, I jumped ahead to the Hello World Pipeline section. It explains how a basic pipeline is structured, so please do go read it.

    Once I’d read the Hello World Pipeline doc, I created a hello-world.yml file somewhere outside of my kamal-deploy-concourse-ci directory, with the following contents:

    jobs:
    - name: hello-world-job
      plan:
      - task: hello-world-task
        config:
          # Tells Concourse which type of worker this task should run on
          platform: linux
          # This is one way of telling Concourse which container image to use for a
          # task. We'll explain this more when talking about resources
          image_resource:
            type: registry-image
            source:
              repository: busybox # images are pulled from docker hub by default
          # The command Concourse will run inside the container
          # echo "Hello world!"
          run:
            path: echo
            args: ["Hello world!"]

    Now all I needed to do is login via the fly CLI, “set” (create) the pipeline, and then “unpause” it because pipelines are created in a paused state by default.

    fly -t imj-ci login -c https://ci.ianmjones.com
    fly -t imj-ci set-pipeline -p hello-world -c hello-world.yml
    fly -t imj-ci unpause-pipeline -p hello-world

    When I logged in I passed “imj-ci” as the “target”, it’s an arbitrary name of your choosing, and allows you to be logged in to multiple concourse instances at the same time. You do still need to use it for each command though, even if only logged into one instance.

    You can optionally pass a user name and password to the login command, but I chose to click the URL it gave me to log in via the web UI.

    It was then time to test whether the pipeline could run. As this simple pipeline doesn’t have any kind of checks (watchers) that will trigger it to run automatically, I needed to trigger it manually.

    fly -t imj-ci trigger-job --job hello-world/hello-world-job --watch

    When you put all that together, it’ll look something like this:

    I now had a successfully run hello-world pipeline in the UI:

    Concourse CI web UI showing successfully completed hello-world pipeline.

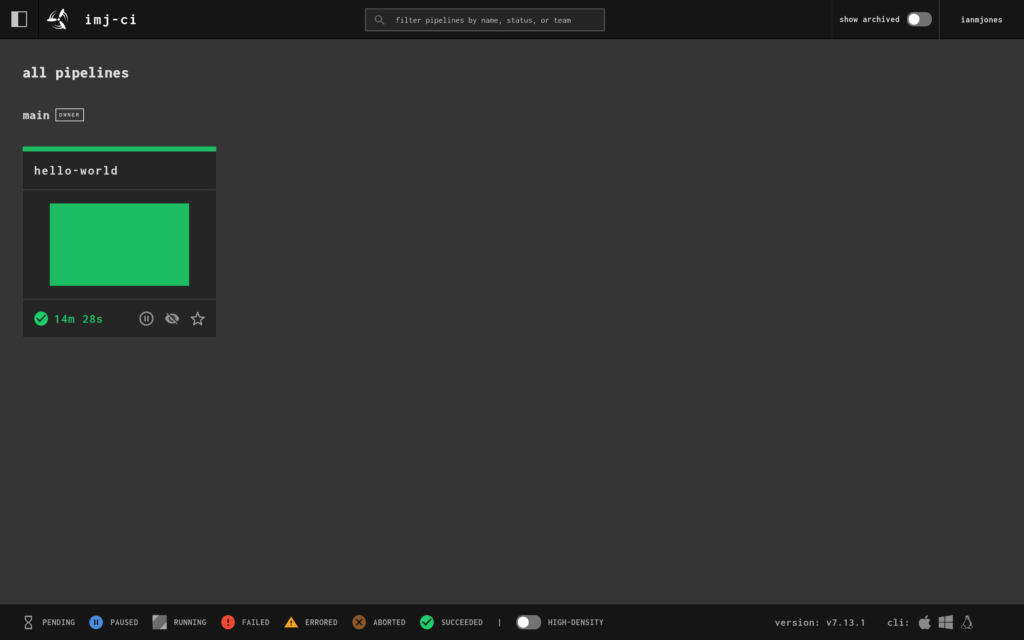
    And when I clicked into it, I could see the job’s details and output:

    Successfully completed hello-world-job details and output.

    Great Success!

    I now have a small Concourse CI server out there in “the Cloud” that I can run all kinds of CI/CD jobs on.

    Obviously all I’ve shown is setting up a very basic “Hello, World!” pipeline, but Concourse CI is incredibly flexible and can do pretty much anything you want given that it’s container based, and there’s a whole lotta Docker images and resources out there to help you run stuff in containers.

    In my next article I’m going to show you a super simple way to create a pipeline that runs whenever a new commit is made to a software project’s git repo, with build and test jobs that must complete successfully before a final job can run, and where changes to the pipeline’s config are automatically picked up from the project too.

  • Snippet Expander v1.1.0 released

    A few days ago I released v1.1.0 of Snippet Expander, “Your little expandable text snippets helper, for Linux”.

    Changelog:

    * Abbreviations that end with another abbreviation are now allowed
    * Abbreviations in pasted text are no longer expanded
    * Debian package no longer built for releases
    * Switched back to MIT license
    * Dependencies updated

    Allowing an abbreviation to end with another abbreviation was a fun one to fix. Previously you could not have an abbreviation like “hw;” that expands to “Hello, World”, and a “w;” abbreviation that expands to say “World”, because if you typed “hw;” it would recognise the “;” trigger key, step backwards and find “w;” and expand it. That would leave you with “hWorld”.

    To fix it, I had to keep tabs on the longest match as I kept walking back until there were no more matches, and then use the last saved match. Pretty obvious in hindsight.

    I’ve also disabled expansion when pasting text in this release. I’ve had this on my todo list for over a year as I’d sometimes hit the problem when using the Search and Paste window, with text within the body of the snippet expanding when it shouldn’t.

    With this release I’ve stopped building the Debian package. It’s difficult to maintain a Debian package outside of the Debian project and keep up to date with the changes to dependencies. You also really need to create .deb packages for both Debian and Ubuntu as their library versions often drift apart and then come back together during the lifecycle of releases. And if you have a stable application that doesn’t need any updates for a while, it’s possible the .deb you built for that version may become out of date when the distro updates the versions of some libs. At that point, you then need to start creating .deb packages for each major version of Debian and Ubuntu that you wish to support. I’ve come to the conclusion that it’s probably best that package definitions are maintained in distro repos, at least for the more brittle package formats.

    This project started out using the permissive MIT license, as that’s what I prefer, and it’s the norm for Go projects. Then at some point I decided I should probably use GPLv2, and I’m not sure why. So I’ve contacted all the code contributors to Snippet Expander (that’ll be just me), and we all (I) agreed to relicense back to MIT.

    Apart from the usual update of dependencies, that’s it, enjoy. 😄

    Tag: https://git.sr.ht/~ianmjones/snippetexpander/refs/v1.1.0

    Binaries: https://git.sr.ht/~ianmjones/snippetexpander/refs/download/v1.1.0/snippetexpander-v1.1.0.tgz

  • Reboot

    Yup, it’s that time again, start my site from scratch time.

    As per previous reboots, no promises as to whether I’ll be blogging regularly, or adding any content of worth.

    One thing I do know, I’ll be saying goodbye to posting via the Gemini protocol. I’m not reading such sites on a regular basis, and I can’t be bothered trying to keep my Gemini site up and running.

    I’m also not going to be writing a separate microblog. I may end up writing small posts to my main feed instead, but the chances are I’ll only use @ianmjones@fosstodon.org for smaller posts. Although, knowing me, that’ll no doubt be very rare too.

    Previous Sites

  • New RSS Feed

    This Atom feed is no longer being updated, please switch to the new RSS feed:

    New RSS Feed

  • Scratching an itch feels good

    Yesterday afternoon I had a real itch to scratch, the nichest of niches of itches.

    When I sit down to start recording a live coding video for my YouTube channel, after opening OBS Studio, I normally hit a button on my Elgato Stream Deck to fire off a script that does the following:

    • Checks that OBS is running.
    • Sends a desktop notification that recording is starting.
    • Switches scene in OBS to a plain background.
    • Sleeps for a second.
    • Starts the recording in OBS.
    • Switches scene in OBS to run the intro video.
    • Sleeps for 4 seconds while the video runs.
    • Pauses all notifications so that they do not pop up on screen.
    • Switches scene in OBS to show the desktop with my ugly mug in the bottom right.

    This is what my obs-start-rec.sh script looked like:

    #!/usr/bin/env bash
    
    pidof obs &>/dev/null
    if [ $? -gt 0 ]
    then
            echo "OBS isn't running."
            exit 1
    fi
    
    notify-send -u low "Starting recording..."
    obs-cmd scene switch "Background"
    sleep 1
    obs-cmd recording start
    obs-cmd scene switch "Intro"
    sleep 4
    dunstctl set-paused true; pkill -SIGRTMIN+10 i3blocks
    obs-cmd scene switch "Desktop+Me-Right"
    

    This has worked well for me for years, however, I recently switched all my machines one by one to Solus, including my desktop PC which I use for recording videos on.

    And then I switched to Solus

    My YouTube Channel

    I use the Budgie Desktop version of Solus, which is awesome by the way, but of course, that means the penultimate line in the above script that tells the dunst notifications daemon to pause notifications, and then refresh the i3blocks display (so I can see the notifications bell icon has changed status) no longer works. dunst and i3blocks are what I used previously when using the i3 window manager on NixOS, with Budgie Desktop neither of those applications are needed.

    Budgie Desktop has a nice notifications system, which you can control from the Raven sidebar area, including turning on "Do Not Disturb". There's also a notifications bell icon in the system tray, clicking it opens Raven so you can see the notifications.

    Unfortunately, I was unable to find a way to programmatically turn on Budgie Desktop's Do Not Disturb setting, or even set a keyboard shortcut. I asked in the Solus forums too, but there was no response.

    Do not disturb keyboard shortcut in Budgie? (Solus Forums)

    So yesterday afternoon, I had a little poke around in the DBus services using D-Spy to see if there was anything related to notifications in there, and sure enough, there I found an org.budgie_desktop.Notifications object, with a very interesting org.buddiesofbudgie.budgie.Dispatcher interface.

    That org.buddiesofbudgie.budgie.Dispatcher interface has a single NotificationsPaused property, a few signals, but most handy for me, two methods, GetDoNotDisturb and ToggleDoNotDisturb.

    Having already built a DBus service server and clients for Snippet Expander, it wasn't too daunting for me to consider whipping up a little CLI application in Go that would allow me to toggle the Do Not Disturb setting in Budgie Desktop. So I did.

    https://git.sr.ht/~ianmjones/budgie-do-not-disturb-status

    As I started to look into creating budgie-do-not-disturb-status, and my mind turned to what I should call the application while setting things up for development, I did check with the BuddiesOfBudgie developers via their Matrix channel to make sure the name was ok to use. I got the ok from Joshua Strobal, which was very kind.

    That was a pleasant afternoon of development, and now my obs-start-rec.sh script looks like the following:

    #!/usr/bin/env bash
    
    pidof obs &>/dev/null
    if [ $? -gt 0 ]
    then
            echo "OBS isn't running."
            exit 1
    fi
    
    notify-send -u low "Starting recording..."
    obs-cmd scene switch "Background"
    sleep 1
    obs-cmd recording start
    obs-cmd scene switch "Intro"
    sleep 4
    budgie-do-not-disturb-status on
    obs-cmd scene switch "Desktop+Me-Right"
    

    Naturally, I have an obs-stop-rec.sh script too:

    #!/usr/bin/env bash
    
    pidof obs &>/dev/null
    if [ $? -gt 0 ]
    then
            echo "OBS isn't running."
            exit 1
    fi
    
    obs-cmd scene switch "Outro"
    sleep 1
    budgie-do-not-disturb-status off
    notify-send -u low "Stopping recording..."
    sleep 9.5
    obs-cmd recording stop
    notify-send -u low "Stopped recording."
    

    I've also added a custom "Toggle Do Not Disturb" keyboard shortcut activated with Shift+Super+N that runs the following command:

    budgie-do-not-disturb-status toggle
    

    It's quite handy to have that shortcut.

    Solus Packaging

    I've submitted a Solus package request for budgie-do-not-disturb-status in the hope that I can then submit the package that I've already got created and am using on my machines.

    https://github.com/getsolus/packages/issues/3607

    https://github.com/ianmjones/packages/tree/budgie-do-not-disturb-status-1.0.1/packages/b/budgie-do-not-disturb-status

    I've already put in a few other Solus package requests for some utilities I use all the time. For each one I've indicated that I'm happy to be the maintainer too, and have already got a package spec ready. Packaging an application for Solus is very straight forward compared to some other distros and package formats, and the documentation is top notch.

    Creating a New Package (Solus Help Center)

    Someone had already submitted a package request for the Gleam language that was accepted, so I was able to get a package created for that, submit the PR, and after a couple of fixups (great learning experience), the PR was merged and now the Gleam language is available in Solus.

    https://discuss.getsol.us/d/10848-sync-updates-for-week-33-2024

    Once a couple of my package requests have hopefully been accepted, and I've been able to get the packages into the Solus packages repo, I should be in a position to do the same for Snippet Expander, which has a dependency on a couple of those packages, and plenty others already in Solus, so will be a bit more of a meaty package to create.

    I already have Snippet Expander built and installed manually on my Solus machines, it's working very well, I just need to create the package for it, which will be another itch scratched.

  • And then I switched to Solus

    A couple of weeks ago I wrote that after a mini distro hopping session I ended up just settling on on Ubuntu Desktop for use on my Framework Laptop 13.

    Switched from NixOS to Ubuntu Desktop on my Framework Laptop 13

    Well, a couple of weeks later, I've switched to Solus.

                -```````````
              `-+/------------.`
           .---:mNo---------------.
         .-----yMMMy:---------------.
       `------oMMMMMm/----------------`
      .------/MMMMMMMN+----------------.
     .------/NMMMMMMMMm-+/--------------.
    `------/NMMMMMMMMMN-:mh/-------------`
    .-----/NMMMMMMMMMMM:-+MMd//oso/:-----.
    -----/NMMMMMMMMMMMM+--mMMMh::smMmyo:--
    ----+NMMMMMMMMMMMMMo--yMMMMNo-:yMMMMd/.
    .--oMMMMMMMMMMMMMMMy--yMMMMMMh:-yMMMy-`
    `-sMMMMMMMMMMMMMMMMh--dMMMMMMMd:/Ny+y.
    `-/+osyhhdmmNNMMMMMm-/MMMMMMMmh+/ohm+
      .------------:://+-/++++++oshddys:
       -hhhhyyyyyyyyyyyhhhhddddhysssso-
        `:ossssssyysssssssssssssssso:`
          `:+ssssssssssssssssssss+-
             `-/+ssssssssssso+/-`
                  `.-----..`
    

    Solus Website

    It occurred to me that I hadn't given Solus a proper test while auditioning distros. I'd used an old version of Solus from last year, which isn't much of an issue in itself as Solus is effectively a rolling release distro, but I'd not played with the new installer, or used it with its Pipewire by default setup.

    Also, as my Entroware Apollo reached 7 years old, I felt a twinge of nostalgia for Solus, which is the distro I used for my 1st year with the laptop. The first couple of stickers I added to its lid were the Solus and Budgie logos, they're both still there.

    So I wiped FreeBSD from my Apollo laptop and installed Solus 4.5, just for the fun of it.

    Which was a bit of a mistake … as I really liked it! 😃

    I found myself updating my dotfiles and update scripts to install a bunch of stuff I regularly use, and found all but a handful of packages were available as a Solus native eopkg.

    To fill the package gaps, I decided to give Flatpak a go for the desktop apps, and Homebrew a go for the CLI apps.

    Flatpak

    Flathub

    Homebrew

    The handful of Flatpaks have worked very well, things like Synology Drive, Plexamp and PhpStorm have no problems at all. I would normally prefer Snaps to Flatpaks, but as Solus is deprecating the use of Snaps on the OS, it's a relief to find out that these apps I use every day are working well as Flatpaks.

    Homebrew on the other hand did not work well at all. It'd fail to install anything because it could not find /etc/ld.so.conf.

    I did a bunch of searching for potential solutions, nothing relevant turned up. Luckily, I'm getting kinda smart at testing this kind of thing where I have no idea whether something is going to work, or end up spitting files all over my system. I'd tested Homebrew in a Solus VM created with Quickemu, having first created a snapshot, so it was easy for me to roll back the VM and test a different method of getting the last remaining CLI apps I need.

    Nixpkgs to the rescue!

    I've used the Determinate Systems nix installer a few times before, it works great, and worked flawlessly for me again on Solus.

    The Determinate Nix Installer

    With it I was able to install some CLI style packages that are important to me, but not yet available in eopkg format, things like Atuin, Elm, Gleam and Kiln.

    I say not yet, because I'm keen to try and create eopkg versions of these apps that I needed to use Nixpkgs for. I've already submitted a couple of super simple packages to make sure I'm all set up for creating eopkgs, and if they turn out to be accepted, that'll no doubt give me the courage to attempt a couple more that I need, but are likely a bit more cumbersome to package up.

    Anyway, I found myself using my Apollo with Solus all the time, the Budgie desktop version of course, forgot to mention that before. I preferred it to using the GNOME based Ubuntu Desktop on my Framework, even though my Framework Laptop is way more powerful than my ancient Entroware Apollo.

    As such, it was pretty much a no-brainer that I should see whether Solus 4.5 worked ok on the Framework Laptop 13.

    As you've no doubt figured out by now, Solus works great on my 12th Gen Framework Laptop 13, even though Solus Budgie does not have fractional scaling for the desktop display.

    To get a better resolution than either the too high density natural 2256×1504 resolution at 100%, but way too blown up resolution at 200%, I just added an entry to ~/.xprofile to scale the display back down a bit when at 200%.

    xrandr --output eDP-1 --scale '1.5x1.5'
    

    Other than that minor "manual" tweak, everything else has been been super smooth when running Solus on my Framework laptop, all the hardware works as expected.

    I like the way Budgie works. Even though I've been using the i3 window manager almost exclusively for the last few years, Budgie's nice sensible "traditional" set up is familiar and easy to use. It has plenty keyboard shortcuts for things like throwing a window to one half or a quarter of the screen, or managing multiple workspaces, which I use extensively.

    I tend to work with one app at a time, maximized, sometimes full screen, and Budgie supports that style or workflow effortlessly. I've therefore not really had to change the way I work at all.

    Maybe one thing that helped my transition to Budgie on my laptop is that I installed Ulauncher, which I've been using for a good few months on my main desktop machine that currently runs i3 on NixOS.

    Ulauncher

    I started using Ulauncher on my main machine after having started to use Ulauncher with Sway on my Framework laptop as a means to simplify and unify my config of all those little things you want quick access to, such as an emoji picker, or clipboard history.

    Even though Solus Budgie has a perfectly fine quick app runner hooked up to Alt+F2 by default, Ulauncher is my one stop shop for launching apps and quickly accessing other utilities via the keyboard, regardless of the machine I'm using.

    Probably the only thing that I'm missing from my i3/Sway config while using Budgie, is being able to set a rule to make Firefox's picture-in-picture window sticky on all workspaces when I pop out the window while watching YouTube. The picture-in-picture window is set as "Always on top" by default, but I just have to right click it and pick "Always on Visible Workspace" to make the window visible on all workspaces. I wish I could automate that, but it's not a big deal either.

    So all in all, it's been a great experience returning to Solus, I'm thoroughly enjoying its simplicity and attention to detail.

    I'm also looking forward to seeing how Solus progresses over the next few years. There's a potential for a lot of great things coming to Solus with its partnership with Serpent OS to modernize some of its infrastructure and underpinnings, and other initiatives.

    I wonder how long I can resist nuking my desktop machine and installing Solus on it? 🤔😆

  • Switched from NixOS to Ubuntu Desktop on my Framework Laptop 13

    I've just switched my vote from NixOS to Ubuntu across on the Framework Laptop 13 Linux Distro Survey.

    Linux Distro Survey – Framework Laptop 13

    Framework

    After a couple of years using NixOS (which I still use on my main desktop PC), I had reason to re-install my Framework Laptop 13 after some hardware issues, and tried all kinds of Linux distros, even some BSDs.

    When I finally installed Ubuntu 24.04 LTS, it was like a breath of fresh air, everything works "out of the box", all the software I use is available one way or another, and it is easy to maintain.

    Ubuntu Desktop

    It's very clear from my mini distro hopping experiment why Ubuntu is so popular, and the base for so many other distros (I nearly settled on Ubuntu Studio, that was really nice). Ubuntu is very well put together, you can tell a lot of time and effort has been spent thinking about and working on the OS built on top of the rock solid Debian base, and improving the desktop experience.

    I left Ubuntu until last to try because it uses GNOME for its desktop, and in general I am not a fan of the direction the GNOME desktop's workflow has developed in the last few years. However, the Ubuntu desktop experience is very sensible, bringing back useful things like the system tray, and implementing a number of other little user experience tweaks that make things that little bit smoother. The changes made in the Ubuntu desktop version of GNOME add up to something quite nice.

    Some of the other distros I tried also use GNOME, or GNOME technologies as the base of their desktop, but are different enough on the surface that you hardly realise. GNOME have made a nice desktop toolkit that can be extended upon to make your own experience.

    Sure, I know I can switch to pretty much any desktop environment or window manager my heart desires on Ubuntu, or pretty much any other distro for that matter, but part of my mini distro hopping experiment was to try and use the stock or recommended experience as much as possible to reduce friction.

    I'd better list the distros I tried. Here they are in alphabetical order:

    Alpine Linux

    Asmi Linux

    Debian

    Elementary OS

    FreeBSD

    GhostBSD

    KDE neon

    NomadBSD

    OpenBSD

    Pop!_OS

    Solus

    Ubuntu Budgie

    Ubuntu Desktop

    Ubuntu Studio

    Void

    Zorin OS

    In my distro hopping, if the OS didn't have a clear favourite desktop environment or window manager setup, I tended to use i3. i3 is my preferred window manager for its user experience, and it's generally easier to set up and better supported than Sway. I have been using both i3 and Sway with NixOS on my laptop, and my NixOS desktop PC has been running i3 for years, and so I have a good set of scripts and utils in my dot files for enabling all the hardware support and other goodies that a window manager like i3 lacks in comparison to a desktop environment.

    It's interesting that I somehow managed to avoid any Arch based distro, I don't think that was intentional, I've used Arch based distros in the past and they're fine (I used EndevourOS for a year or so).

    I did however intentionally avoid anything based on Fedora. I first used Red Hat Linux back in the late '90s, when I picked up a boxed version of RHL 5.1 or 5.2 from Waterstones (can't remember actual version, although I'm pretty sure the box was grey in colour). It was my 2nd foray into Linux and was amazing, Linux had come a long way since I first tried it a couple of years earlier. I've not really used it much since, only as RHEL on client's servers, as I'd ended up using predominantly Debian and OpenBSD for personal machines by 2000. Seeing as it's seemingly all-in on stock GNOME, and owned by IBM, I couldn't be arsed with it.

    I also seemingly pretty much avoided Linux distros that use Flatpak as their preferred "next gen" package format. I'm not a fan of Flatpak, it never seems to work well for me, Snaps on the other hand never let me down 🤷. It's been a while as they were the first couple of OSes I tried, but I remember trying a couple of Flatpak packages while using Elementary OS and Zorin OS, hitting some issues, and ended up swapping them out for snaps or debs. Is it the law that if your distro ends with "OS" you have to use Flatpak as your preferred package format? 🤔

    It does feel like I'm drawn to the slightly more niche distros. I really wanted Alpine or Void to work out, but they're a fair bit of work to get sorted, and I bounced off them (not for the first time, and probably not the last).

    Having a good play with the various BSDs was an eye opener, in a good way. I initially bounced off of FreeBSD as I had problems just getting a desktop up and running. I then went through my old favourite OpenBSD, which is great, but suffers from a lack desktop software compared to FreeBSD, before having a look at the new to me NomadBSD. NomadBSD was really nice. Although positioned as primarily for running from removable media like a thumbdrive, you can install it to your internal disk. I really liked it, and being back in the BSD world made me smile, having spent many years working on SunOS/Solaris, using OpenBSD for personal server stuff, and Mac OS X/macOS since the early 2000's. However, something weird happened with the NomadBSD install after an update that left it in a weird unbootable state unless I jumped through some BIOS hoops, so I took that as a sign to try another distro. GhostBSD was next, and that was super nice too! I could probably have stayed on GhostBSD, but I found that the project, while built on FreeBSD, is just enough different, and set up with some (albeit quite nice) slighty different defaults, that getting support and trying to follow FreeBSD guides to configure GhostBSD got a little tricky in some scenarios. With that nice easy on-boarding experience that GhostBSD gives to what is mostly FreeBSD under the hood, I had another crack at FreeBSD.

    One thing I haven't mentioned yet is that for a good chunk of these distro hops, while I was using one distro on my Framework laptop, I'd often audition the next candidate on my 2017 Entroware Apollo laptop.

    Entroware

    At the moment, my Entroware Apollo laptop is still running FreeBSD, it's lovely. Sure, there are a few things here and there that mean it's got just a fraction too much friction to be my primary laptop OS just now, but it is so close. Having learnt a lot from running GhostBSD, when I had another go at running FreeBSD, it kinda just worked, and is currently up and running with my usual i3 desktop. If it wasn't for some some software that has been built with only Linux and the GNU utilities in mind, I'd probably be using FreeBSD on my Framework laptop too, maybe even my desktop PC!

    It's made me think about how Linux specific Snippet Expander is. It was always intended to be first and foremost for Linux, but maybe I should see if I could get it working on the BSDs too. I have done a quick test to see if it'll build, no dice, but I bet with a little work and contributions to Wails I might be able to get it to build.

    Snippet Expander

    Having reluctantly bounced off of FreeBSD for use on my primary laptop, here I am using the "no one will get fired for using …" distro of choice these days, Ubuntu Desktop.

    Ubuntu lets me do all the kinds of stuff I might need for my personal computing needs, including open source development, email, browsing, and watching DRM encumbered streaming services such as Apple TV+, Disney+ and Netflix.

    I'm not saying I'll be using Ubuntu Desktop on my Framework laptop forever, but it sure is nice to have a rock solid, no-nonsense, low friction OS where I'm not missing out on anything, and it is easy to use.

    Maybe I'm just getting old.

  • Snippet Expander v1.0.2 Released 🎉

    Snippet Expander v1.0.2 is now available.

    https://snippetexpander.org

    Changelog

    • Fix copying snippet on Wayland
    • Fix pasting snippet on Wayland (when using standards compliant compositor)
    • Remove dependency on cgo and xtst
    • Now depends on xclip and xdotool for X Server
    • Now depends on wl-clipboard and wtype for Wayland
    • Other dependencies updated
    • Minor fixes to man pages

    Wayland Support

    Snippet Expander now works when using a Wayland compositor. Snippet Expander used to work fine with Wayland when auto expanding snippets, but not so much when using the Search & Paste window.

    Previously, Snippet Expander used a Go library that did not use any external dependencies (in the form of programs) to add a snippet to the clipboard, or when grabbing the clipboard contents to insert into a snippet's body that used the @clipboard placeholder. This library did not work on Wayland (at least for me), so I switched to another library, but this library does use external programs to work with the clipboard. This new library has proven very reliable, using either xclip or wcopy (from the wl-clipboard package) to save or retrieve snippets to or from the clipboard.

    xclip

    wl-clipboard

    Snippet Expander used to then use some custom cgo code I wrote to simulate using the ctrl+v keyboard shortcut to paste a snippet into an application once the Search & Paste window had closed. However, this simply did not work on Wayland (although I could swear it used to), no matter which X Server and Wayland supporting C library I tried to use.

    So now, instead, Snippet Expander uses either xdotool or wtype on either X Server or Wayland desktops respectively to "press" ctrl+v.

    xdotool

    wtype

    On X Server this works fine everywhere I've tested it, but on Wayland, this only works on compositors that support the virtual keyboard protocol standard. So on wlroots based compositors like Sway, all is good, but on KDE Plasma or GNOME, not so much. It seems like KDE hasn't decided yet whether it will support the virtual keyboard protocol in Plasma, but GNOME isn't going to, which is a shame. I don't understand why a Wayland compositor wouldn't want to support all the standards. 🤷

  • Snippet Expander v1.0.1 Released 🎉

    It is my immense pleasure to announce that Snippet Expander v1.0.1 has been released!

    https://snippetexpander.org

    What Is Snippet Expander?

    Snippet Expander is "Your little expandable text snippets helper", for Linux. With Snippet Expander you can type a saved abbreviation and it will automatically expand to the associated body text.

    Placeholders

    Your snippets can optionally include placeholders for formatted and calculated dates and times, the clipboard contents, other snippets, and cursor position.

    Placeholders Manual Page

    Search & Paste Window

    There is also a very handy search and paste window for if you can't remember your abbreviation, or happen to be using an application that does not allow auto expansion of snippets. Personally, I pretty much always use the search and paste window, and find holding down the shift key when I select a snippet a great way to have the snippet body pasted into a terminal window when the search and paste window closes.

    The most recently used snippets are shown first in the search and past window, with numeric quick select keys for the first 10 items. So opening the search and paste window via a shortcut, typing a couple of letters to search your snippets, and selecting the right one can be super quick.

    Snippet Expander's desktop application will try and set up a shortcut for the search and past window when first run, but if it can't, you can set up the shortcut using your system's settings. Just call the application with the –search-and-paste option:

    snippetexpandergui --search-and-paste
    

    Options in GUI's Manual Page

    CLI

    There is also a fully featured command line interface that can be used to manage snippets and settings.

    CLI Manual Page

    What Happened to Snippet Pixie?

    Snippet Expander is a complete rewrite of Snippet Pixie using (mostly) different languages, with a more flexible architecture, giving improved speed, stability and utility.

    Snippet Pixie is now considered deprecated, and is no longer being worked on as Snippet Expander supersedes it.

    You can export your snippets from Snippet Pixie and import them into Snippet Expander.

    Where Can You Get It?

    Snippet Expander isn't packaged for any Linux distro just yet, although I have submitted a pull request to Nixpkgs.

    Nixpkgs PR

    I might have a crack at building a Debian package, but I'm not sure whether I'll build any other package formats myself. I'm more than happy for other people to package Snippet Expander for their preferred Linux distro, or universal packaging format.

    So, for the time being best bet is to checkout the source and build it yourself, instructions are on the repository's readme.

    Snippet Expander source code on SourceHut

    Quick Demo on YouTube

    If you want to see Snippet Expander in action, I did a quick demo in a YouTube video on my Always Developing channel.

    Snippet Expander: v1.0.1 released! 🎉 | Always Developing #226

    Enjoy!

    Hope you find Snippet Expander useful and enjoy using it. If you have any questions or feature requests, please get in touch via either of the project's mailing lists, IRC channel, or directly via the contact methods on this site.

    snippetexpander-discuss mailing list

    #snippetexpander IRC channel on the Libera.Chat network

    Contact Page

  • OSNews

    The other day, OSNews launched their own Gemini capsule. For a site that as far as I can tell, is basically text only, this makes perfect sense, and was an instant bookmark and subscribe in the Gemini browser I use daily, Amfora.

    OSNews launches Gemini capsule

    OSNews Gemini Capsule

    Amfora – alas in maintenance mode

    OSNews adding a Gemini capsule prompted me to reminisce about the site, and wonder just how long it's been adding interesting links and commentary items to my daily RSS feed reading habit.

    One of the oldest OS's I remember being introduced to me via OSNews is Unununium. From searching OSNews, first mention of Unununium was in September 2001, so that means I've been reading the site for at least 22 years!

    Unununium

    OSNews – First Operating Engine Without a Kernel (Unununium)

    Unununium was a very interesting system written in assembly where everything was in user space, even the kernel, as such, and I remember enjoying building and installing it on some old hardware, or maybe in a virtual machine, not quite sure. I remember trying out a bunch of other "hobby" operating systems at the time, there seemed to be quite a renaissance at the time.

    I suspect I first became aware of OSNews via some coverage of BeOS, which they covered quite often, and after its demise, Haiku too. I really loved BeOS, still have some original disks I'm loathed to throw out (I gave away my BeOS Bible and developer's guide though), and often find myself firing up Haiku in quickemu or on an old laptop to see just how far it is getting along (very far, it's really good and stable for me these days).

    In fact, I visit the Haiku Community forum every day to keep tabs on the project, and of course I subscribe to its blog, and its Gemini capsule.

    OSNews – Search Results for: BeOS

    OSNews – Search Results for: haiku

    Haiku

    Haiku Community

    Haiku Gemini Capsule

    While Unununium and BeOS are long dead, OSNews is still very much alive and kicking, and I still read it every day, often being sent off on some rat-hole of reading about some new project or interesting going-ons in the world of OSes and open source software and hardware.

    As mentioned, I generally read OSNews via RSS, but while searching for Unununium on the site I of course got to see what it looks like today, which isn't too dissimilar to how I remember it always being, clean, simple and content focussed.

    One thing I didn't know, and noticed while looking at the site for the first time in ages, was that OSNews has a Patreon account. Seeing as I've been enjoying the site for so long, for free, seemed like a no-brainer to become a member, and show my support.

    OSNews Patreon

    Anyway, thank you OSNews for launching a Gemini capsule, and thanks for keeping me informed about operating systems new, old, big and small for such a long time.